Our 1994 FZJ80 Toyota Land Cruiser is by far the vehicle we put the most work into. I had wanted to purchase one of these for a while and I was finally able to convince Jennifer that it would take our travels to the next level. Her being the ever so grounded person that she is and knowing that I’m a gear head, set one condition. “This is not Jeremy’s Land Cruiser…. This is the Family Land Cruiser….” Meaning this is not something that Jeremy is going to be working on alone, but something we will all work on as a family. And that’s exactly what it ended up being and it also ended up playing a little part in choosing the name “Family Adventures Overlanding”. We put a lot of blood sweat and tears into this vehicle, as you’re about to see, and it never failed us once. We still get emails from all over the globe asking questions about it and the repairs that we’ve shared on Youtube.
So how did it start and where did we get it? Well, we bought it in Doswell, VA about two hours north of where we lived at the time. We actually looked at it twice and turned the seller down once before over the asking price. They were asking $5000 for it and it needed a lot of work. They used it for their cleaning business and the cleaning chemicals had been spilled all over the carpets and basically bleached it in some places and stained in others. It had bright red leather interior, that I wasn’t too fond of, and the undercarriage was covered in oil from front to rear. Oh, and the upper tailgate was rotted out too. Either way, we thanked them for their time and we walked away from it.
A few months later the seller reached out to me and said that they were going to drop the price one more time and if it didn’t sell after that they were going to send it to the salvage yard. They dropped it $1000 and it still just wasn’t worth it to us to take on such a big project. A month or so later, we just happened to be in Richmond, VA and Jennifer noticed that it was still listed and that they dropped it to $3500. We contacted them and stopped by their home to take one more look at it. While there, the sell confided in me that we’d been the only potential buyer that has been upfront and honest with him and that if we still wanted it, they would take $2500 for it. So that night we had a long conversation as we drove home and the next morning, we picked up our Land Cruiser.
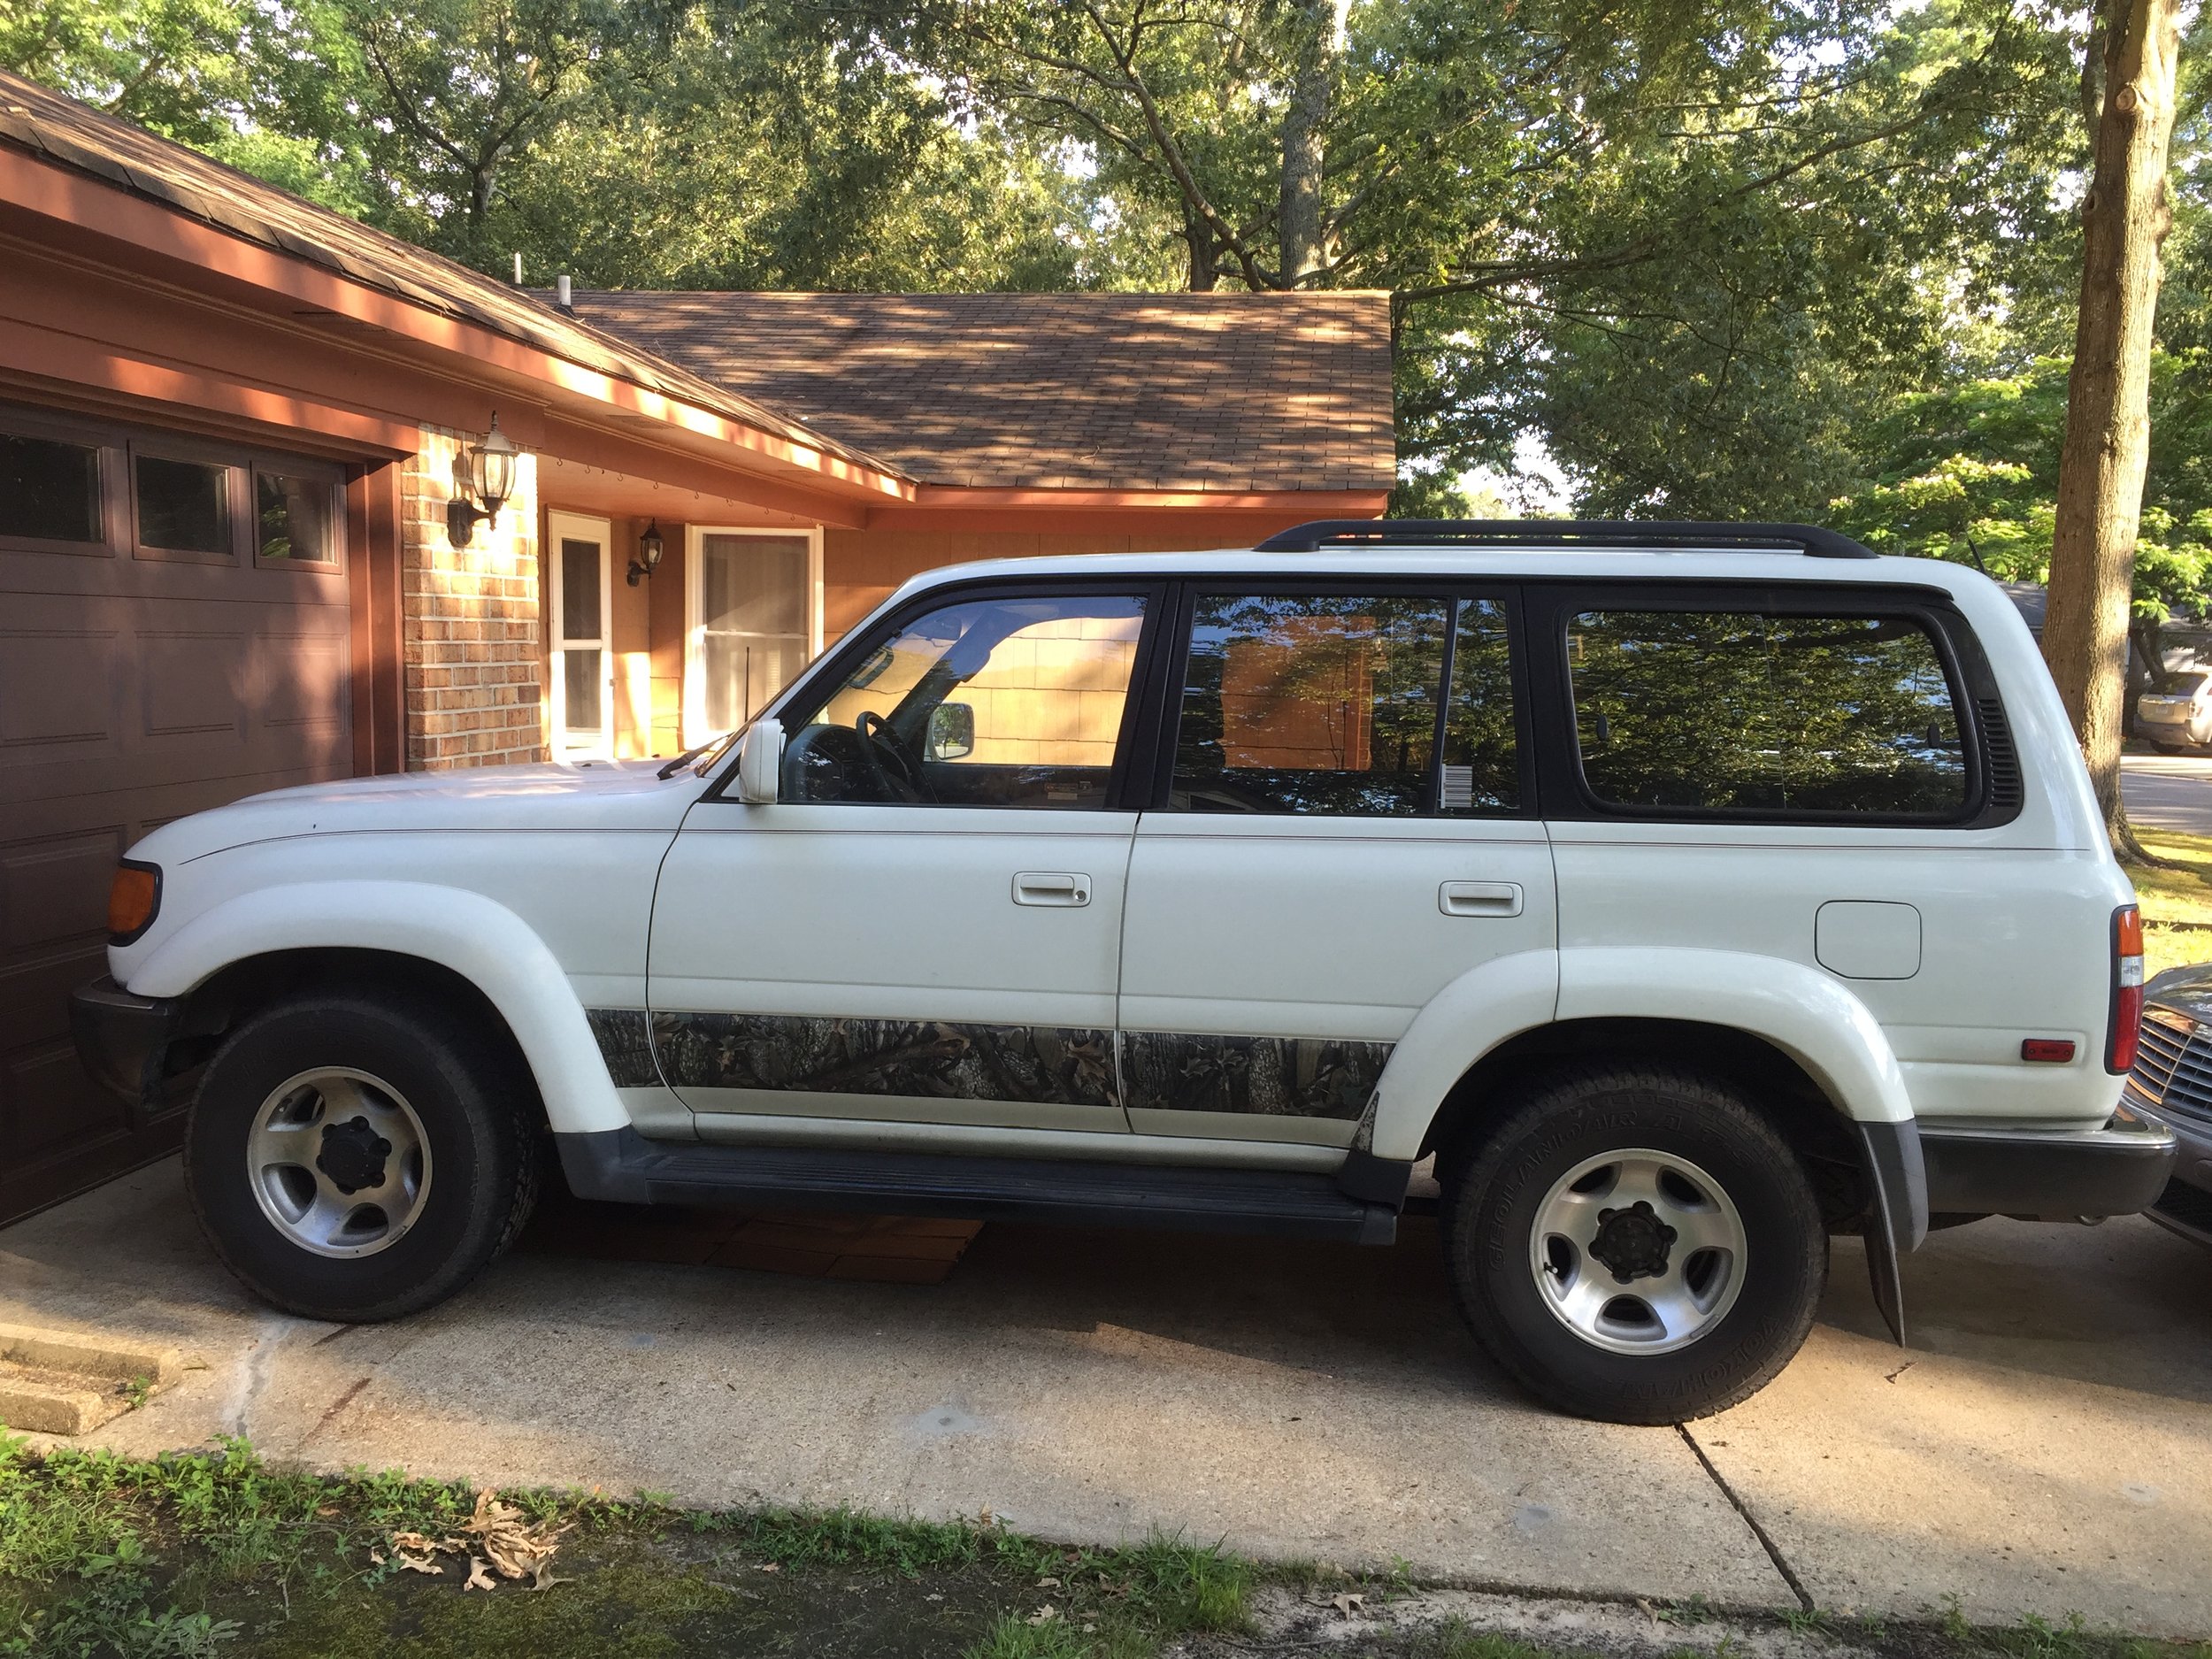
Now we don’t know about you, but Real Tree Camo is not our cup of tea. So the first thing on the list, just so we could stomach walking by it in the driveway, was that the Real Tree decals had to go!

The next order of business was to replace the rotted upper tailgate that was leaking water into the cargo area. Luckily we were able to find one and the same color at a junkyard north of Richmond, VA. So we picked it up and swapped it out. This is a very common issue on pretty much any Land Cruiser and if you’ve checked out our YouTube page, you’ll know that this was not the last time we had to deal with the upper tailgate issue.

It’s not just the upper tailgate that suffers from corrosion issues on Land Cruisers. They also are known for corrosion behind the fender flares, running boards, bumper covers and mud flaps. All of these plastic body parts are also know to break and are sought after pieces if they’re still in good condition. With that in mind and the fact that I’ve always preferred the South American Land Cruisers that came without all of these parts on them, we decided to sell all of the pieces to help fund the rest of the repairs. By the way, just in case you think we’re crazy for doing this, here’s one other thing to keep in mind. 80 series Cruisers are known for their flexy suspension and can handle some crazy obstacles in stock form. The one thing that almost never survives this or a tight trail is, you guessed it, the stock fender flares.
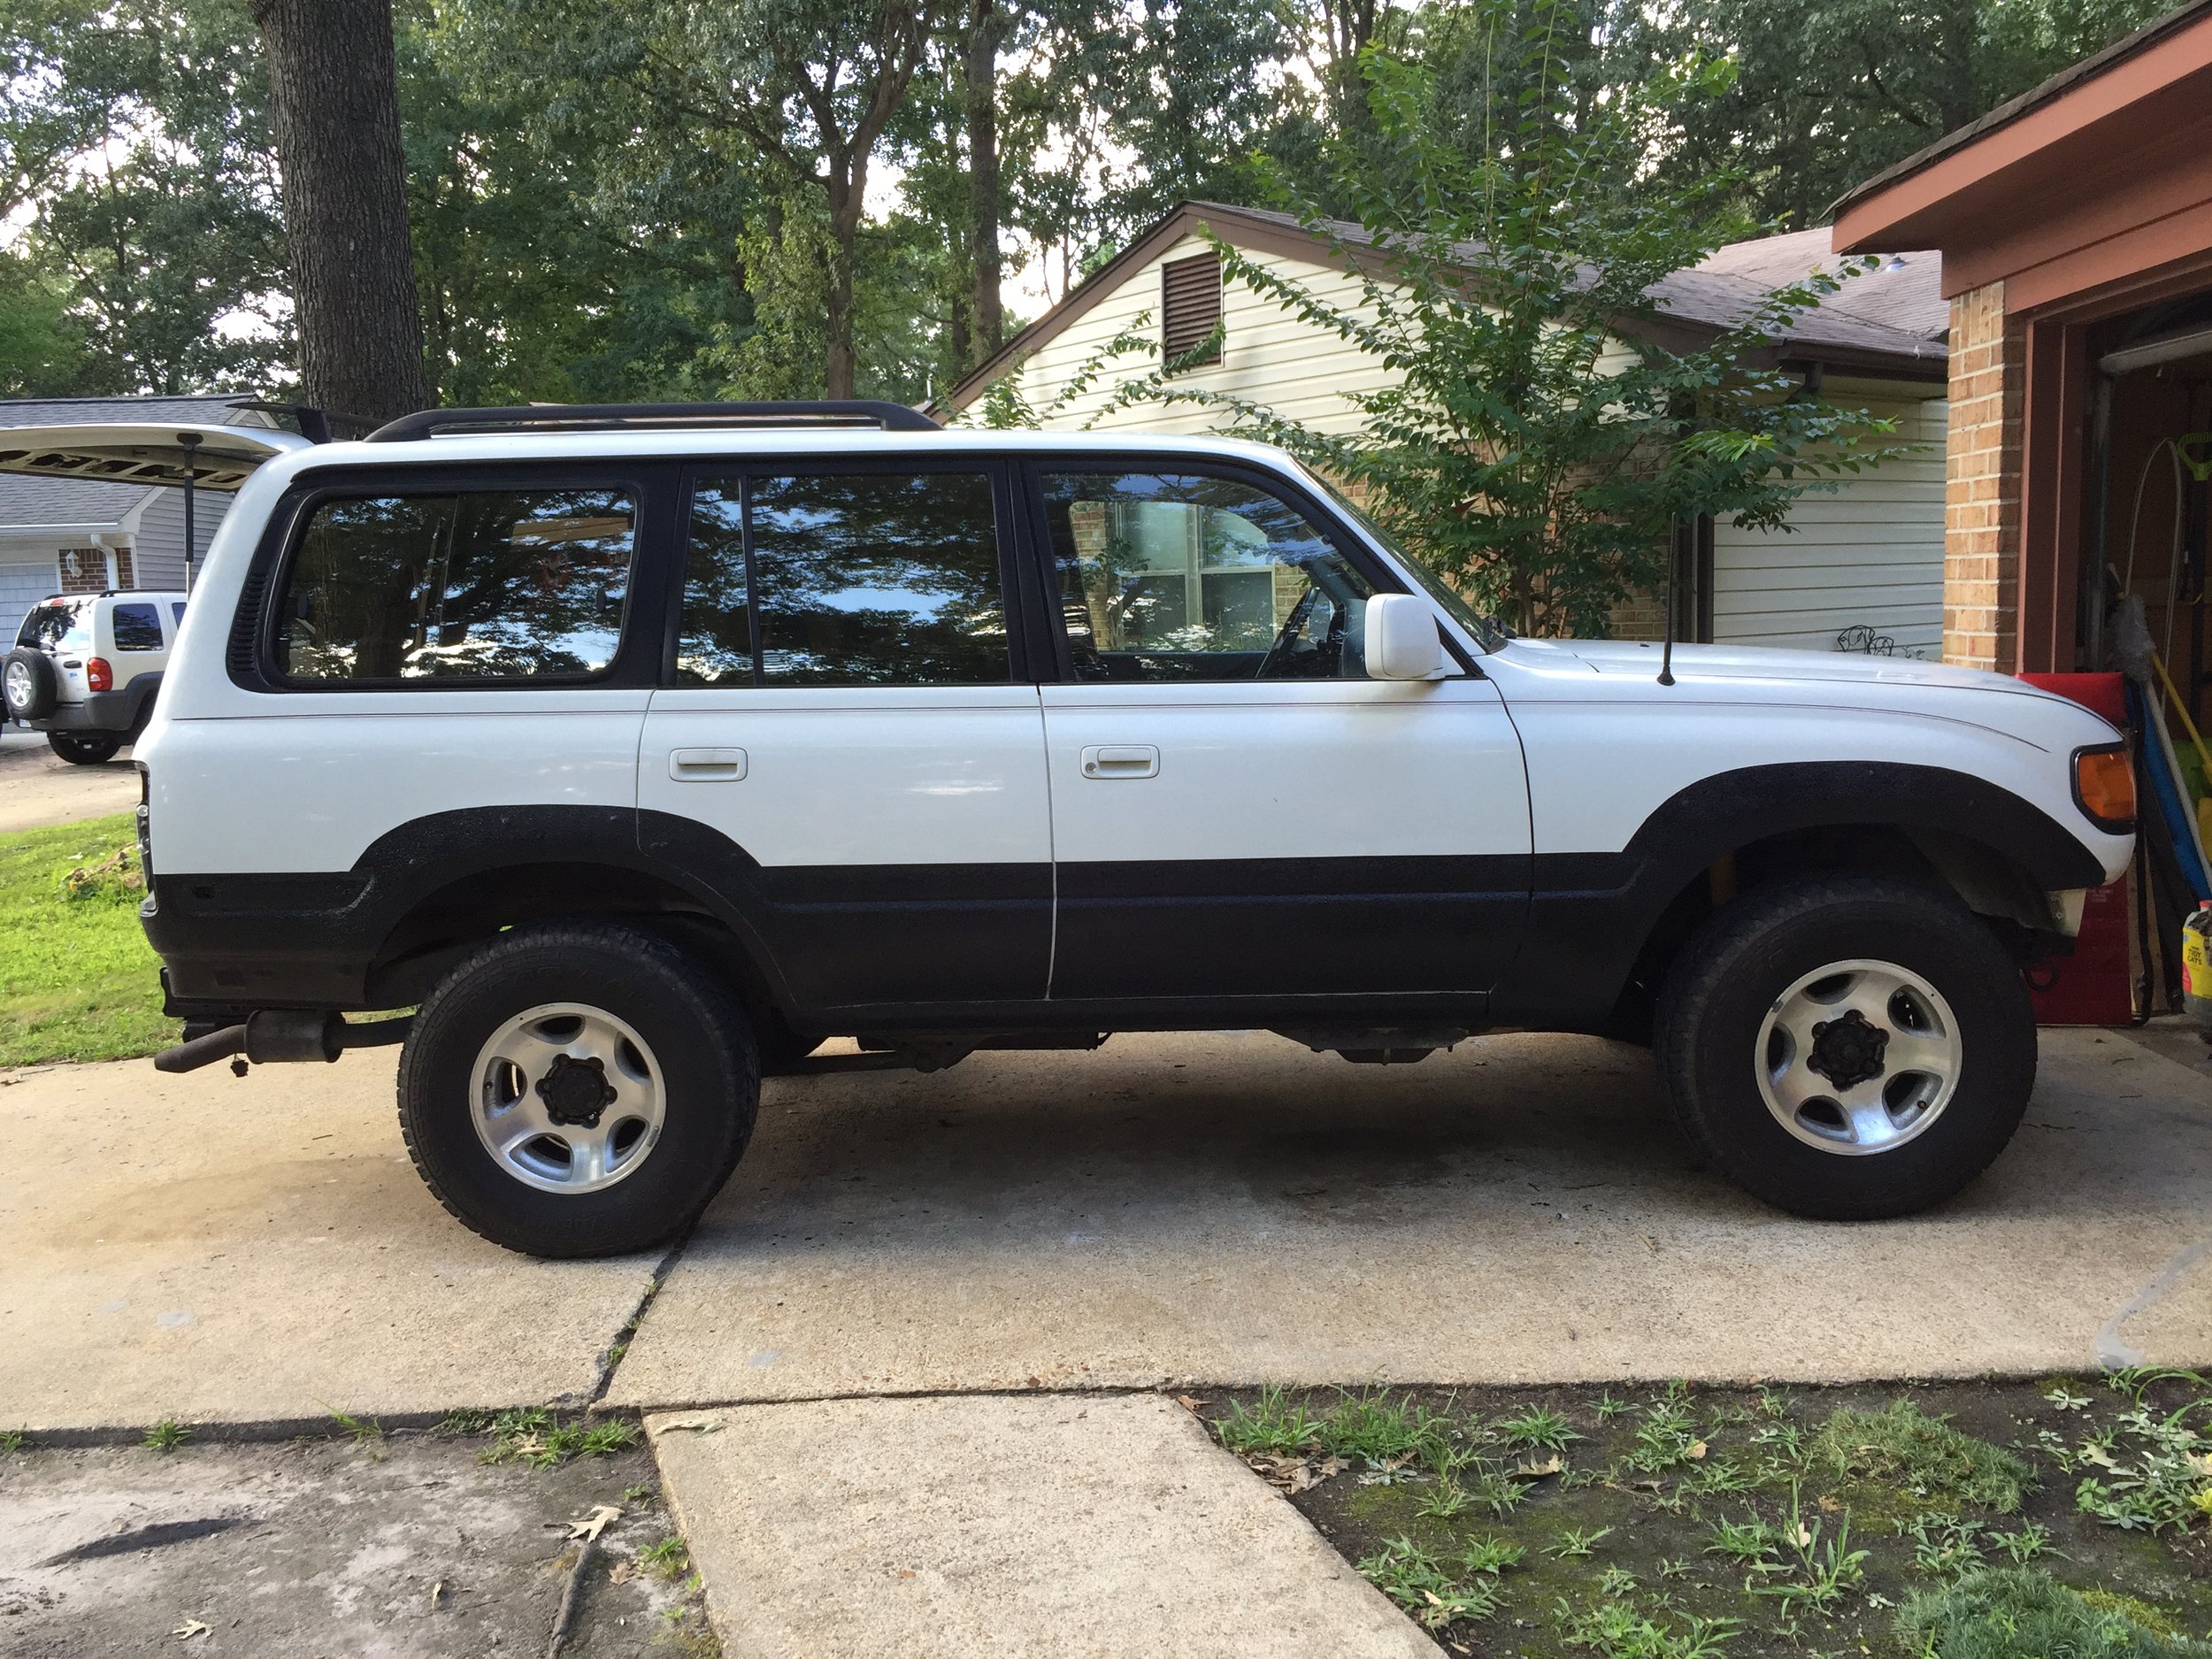
With all of the body cladding removed, we had a decision to make. Do we weld the mounting holes closed and do a bunch of bodywork or do we just seal them off with something that is reversible. We chose the later and as you’ll notice from the picture, we touched up any corrosion and installed plastic trim push pins with some RTV applied to the back of them. The RTV was purely so moisture would not get behind them and start the corrosion process all over again. This is important as it would be difficult to notice corrosion in these areas once we sealed the lower body in bedliner. We chose bedliner because it would help to fully protect and seal the wheel arches and lower rockers from any scrapes, nicks or chips on future adventures.

Jennifer worked on sanding the body while I was at work. When I got home that evening, we all jumped on the paint brushes and knocked it out. We had no idea if this was going to work and we hadn’t seen another one done like this so it was kind of a leap of faith. We think it came out pretty darn good!


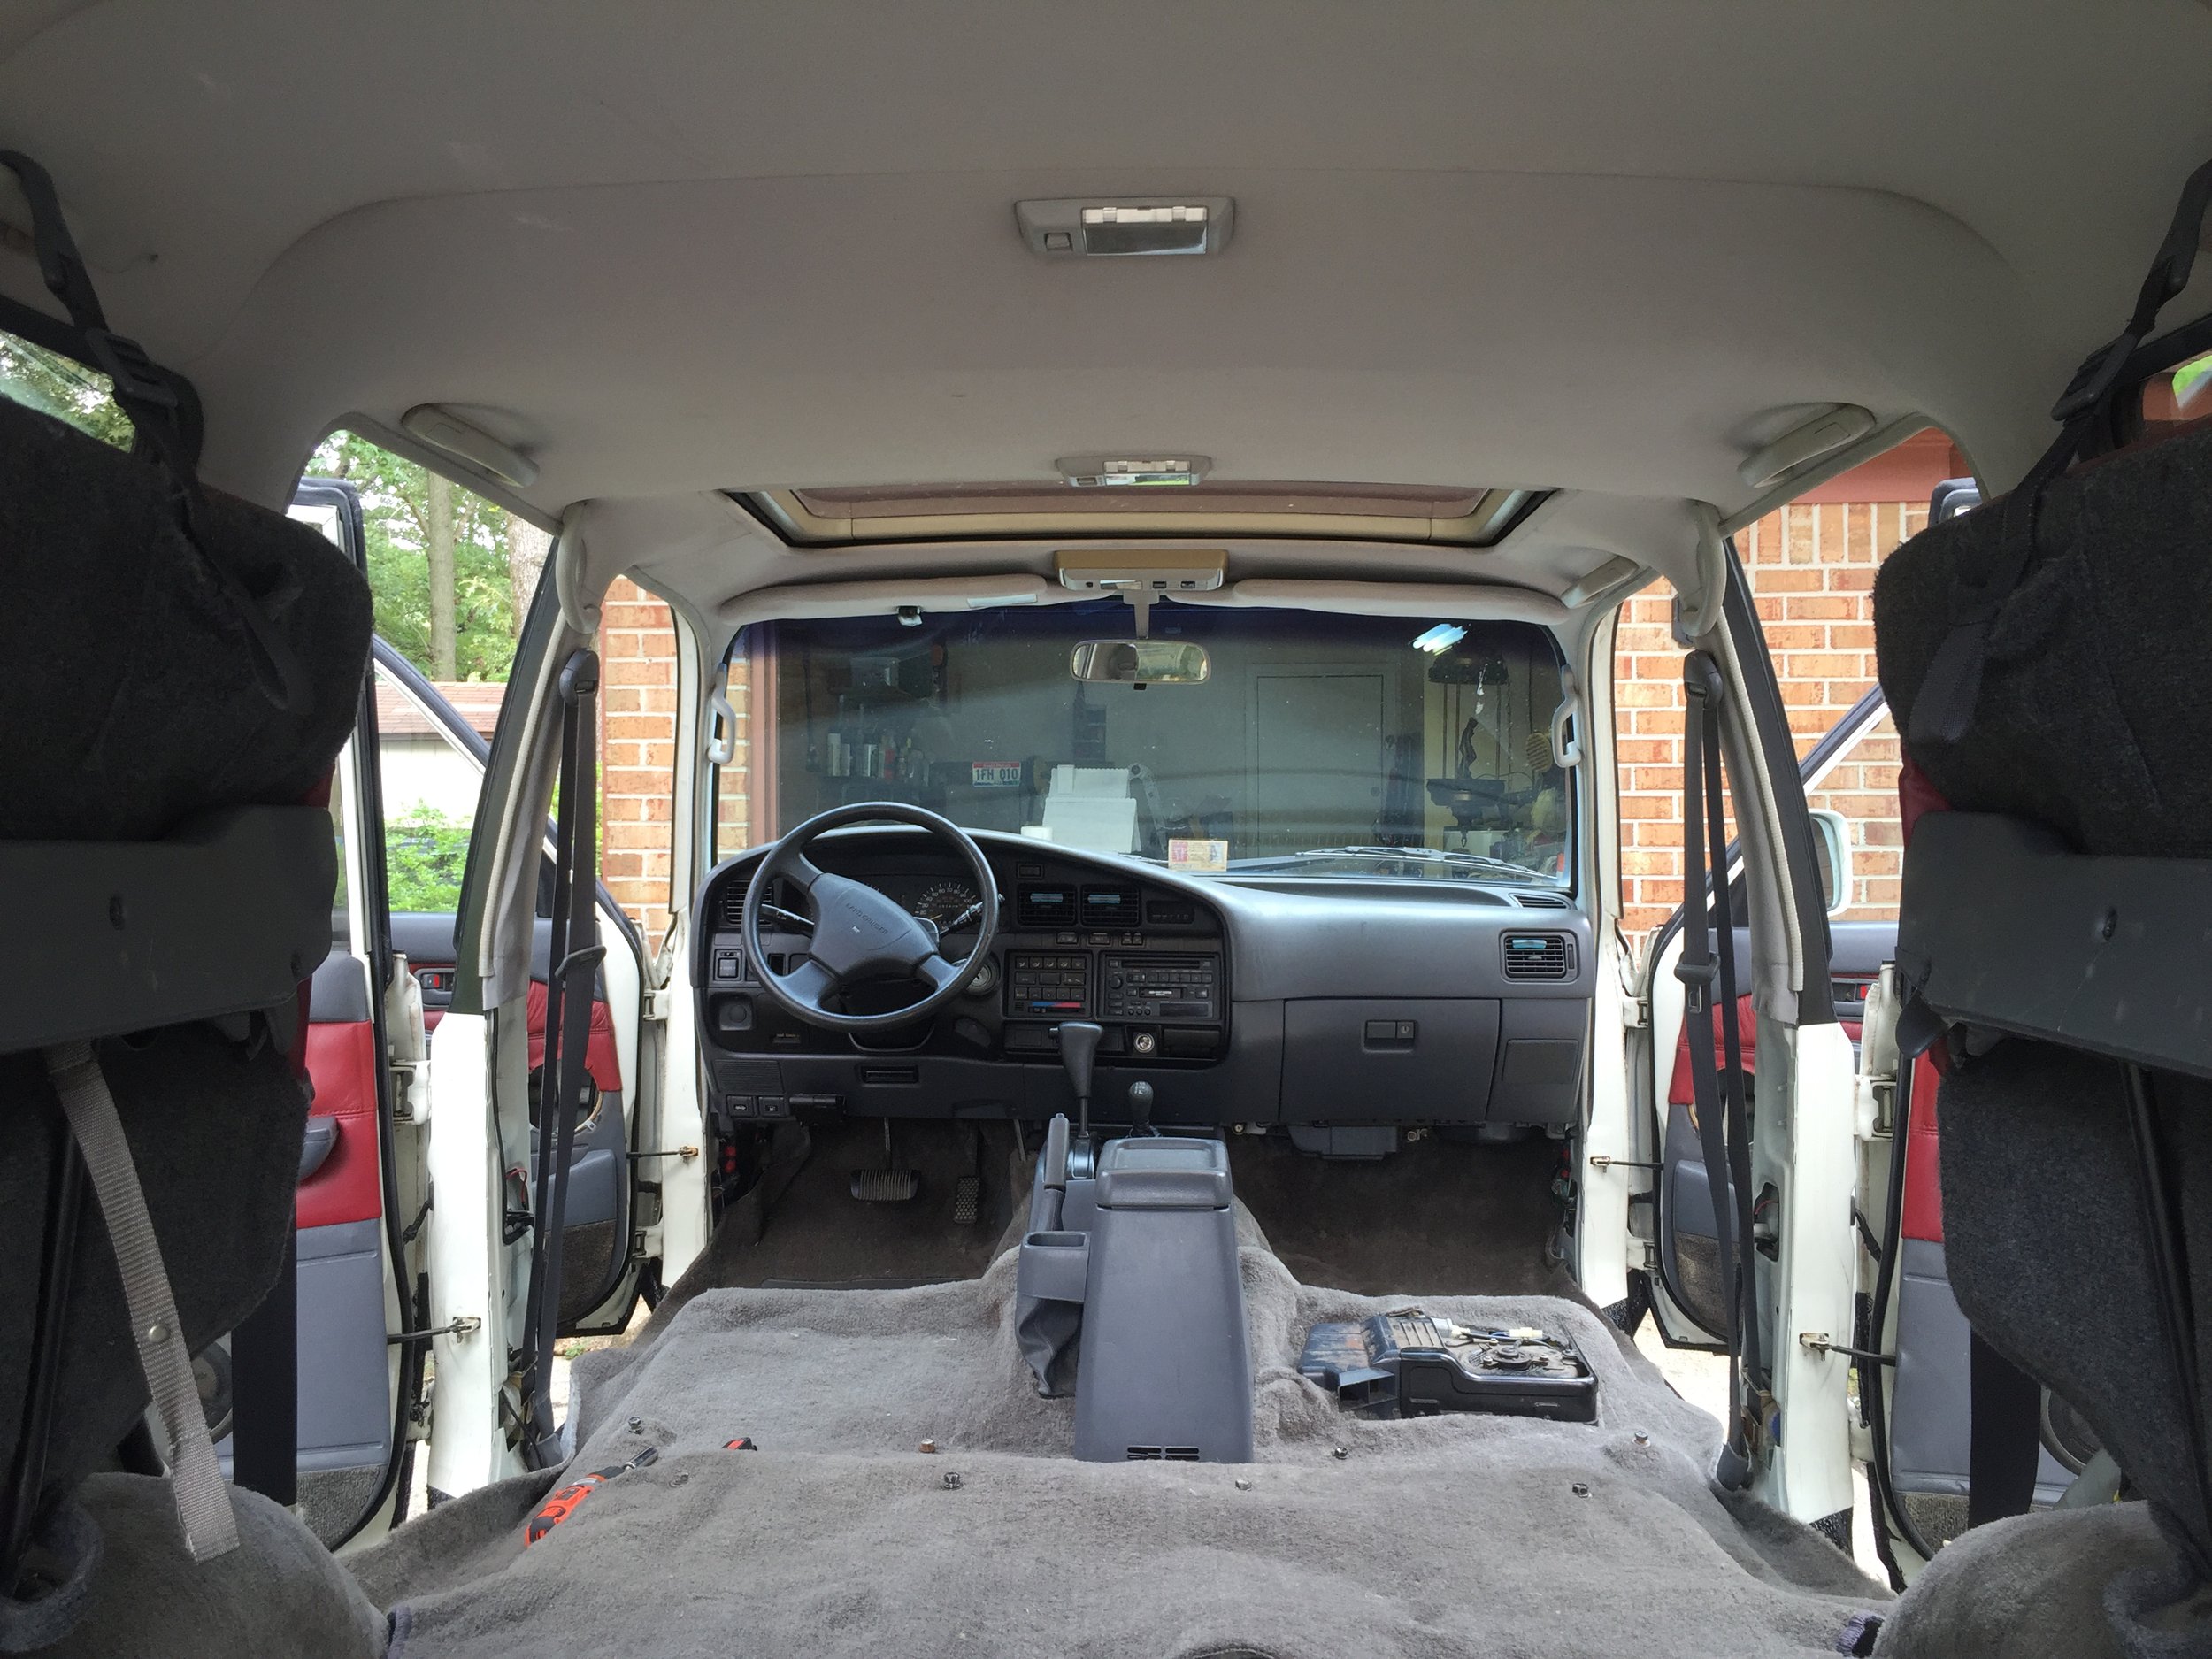
The interior was pulled out of the Cruiser before we painted the lower bodywork with the bedliner. This allowed us to take all of the sill plates off of the door openings and extend the bedliner up and over the rockers and sills. Before putting the interior back together, we did a deep clean inside scrubbing everything in sight. Once it was everything was clean we repaired any signs of corrosion we could find and removed any unnecessary wiring, like the aftermarket alarm system that we discovered on disassembly.
Of course we weren’t going to reinstall that nasty carpeting that basically fell apart when we removed it. So we sourced and installed an aftermarket carpet kit. To hold the carpet and interior trim pieces in place we installed all new OEM Toyota trim fasteners. It’s pretty amazing that you can still get all of those parts from Toyota. We also installed a center diff lock switch, performed the 7-pin modification and installed a CB/AM/FM splitter that ran to a Firestick antenna at the factory location on the passenger fender.


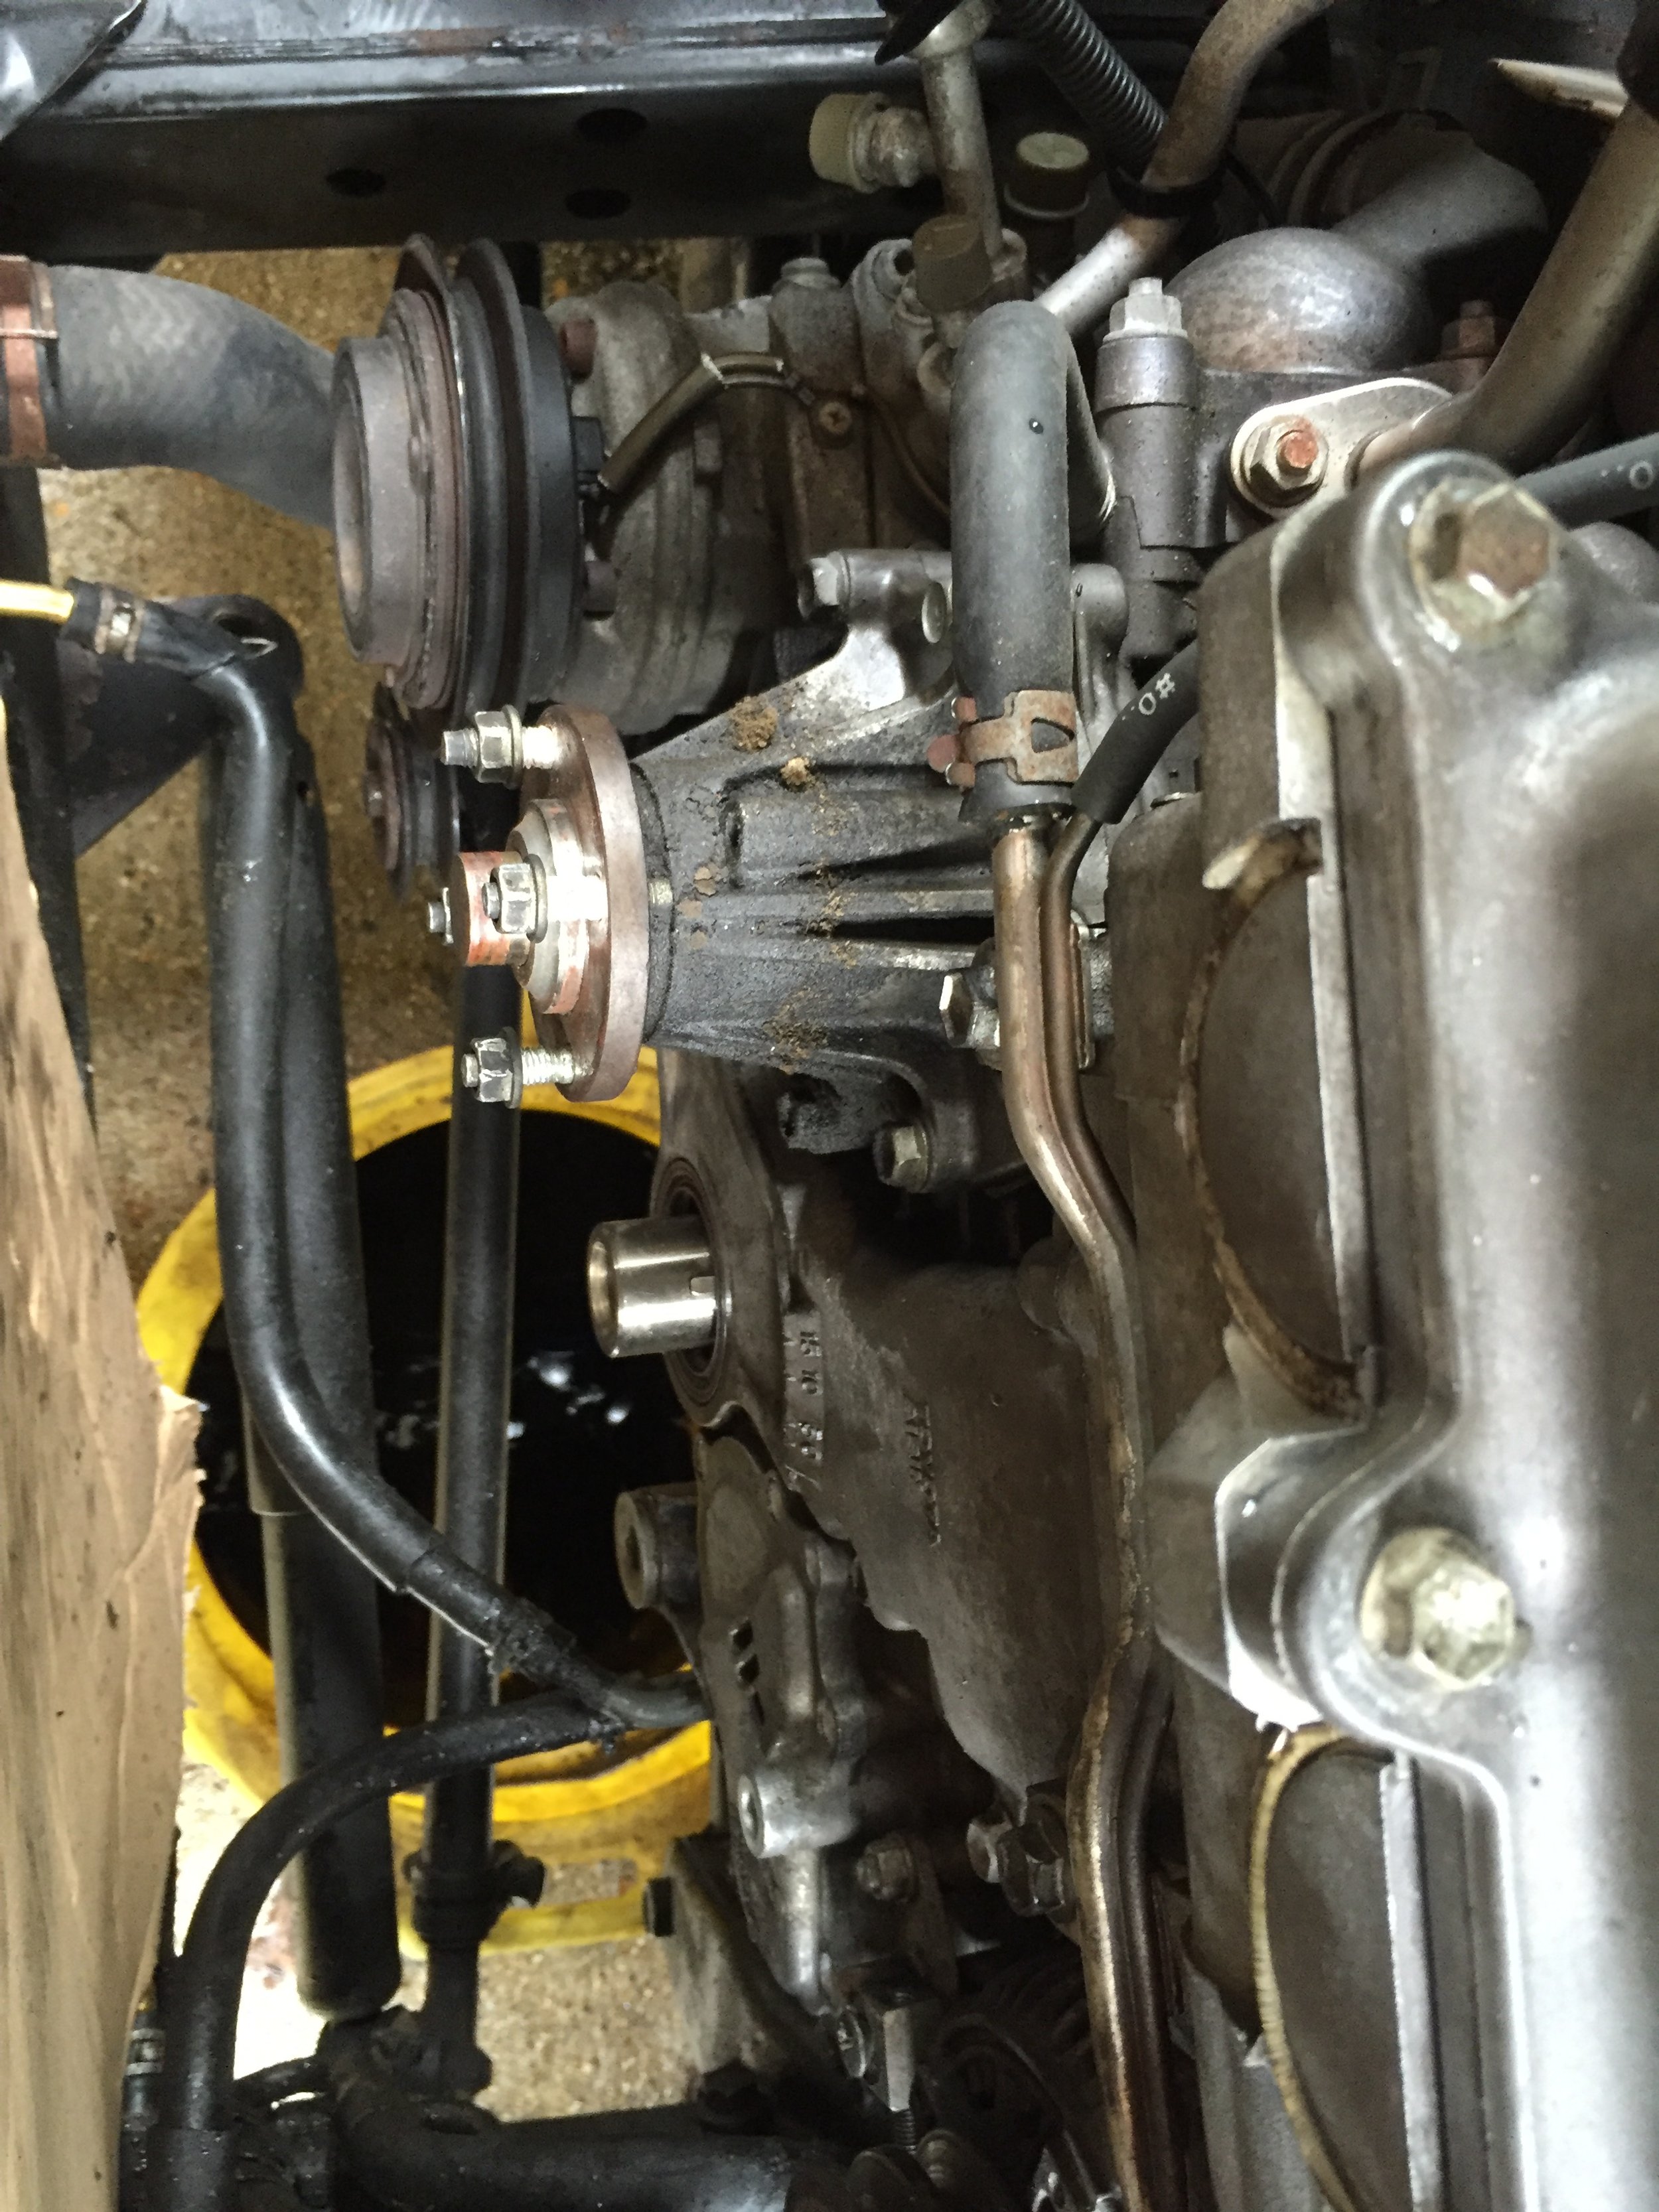
With the interior buttoned up, we focused on tackling the oil leaks. These consisted of the distributor shaft, valve cover, oil pump housing, front crank seal, power steering reservoir hoses, front and rear axle seals, and the front and rear pinion seals. While we were in the engine bay we also installed a new water pump, thermostat and hoses with Toyota coolant, all new Toyota seals for the distributor, valve cover, front crank seal, power steering reservoir hoses and oil pump gasket and hardware. The picture below was taken after a case of brake clean was used to expose the engine under all of the grime.


With the oil leaks all sealed up and some miles on the Cruiser it was time to finally start the real build. To protect the engine and ensure that we had clean air at all times, we chose to install a safari style snorkel on the passenger fender. “Safari style” because it was an Amazon cheapy that we had painted and sealed every intake connection with RTV. This snorkel’s main purpose was to prevent dust/dirt from entering the air filter housing. It also came in extremely helpful years later when I had to rescue/evacuate a friend during a hurricane. I’m not kidding when I tell people that this rig has done things that I didn’t think were possible. In that particular instance, I had to drive through water deep enough to come over the hood and at one point the Cruiser actually started to bob up and down in the water while it was hunting for traction. By the way, make sure to spray WD-40 on the distributor and ignition wires if you ever plan to attempt anything that deep. They just so happen to be at the same height as the air filter housing and could start to cut out when they get wet. I’m sure you can figure out how I know!


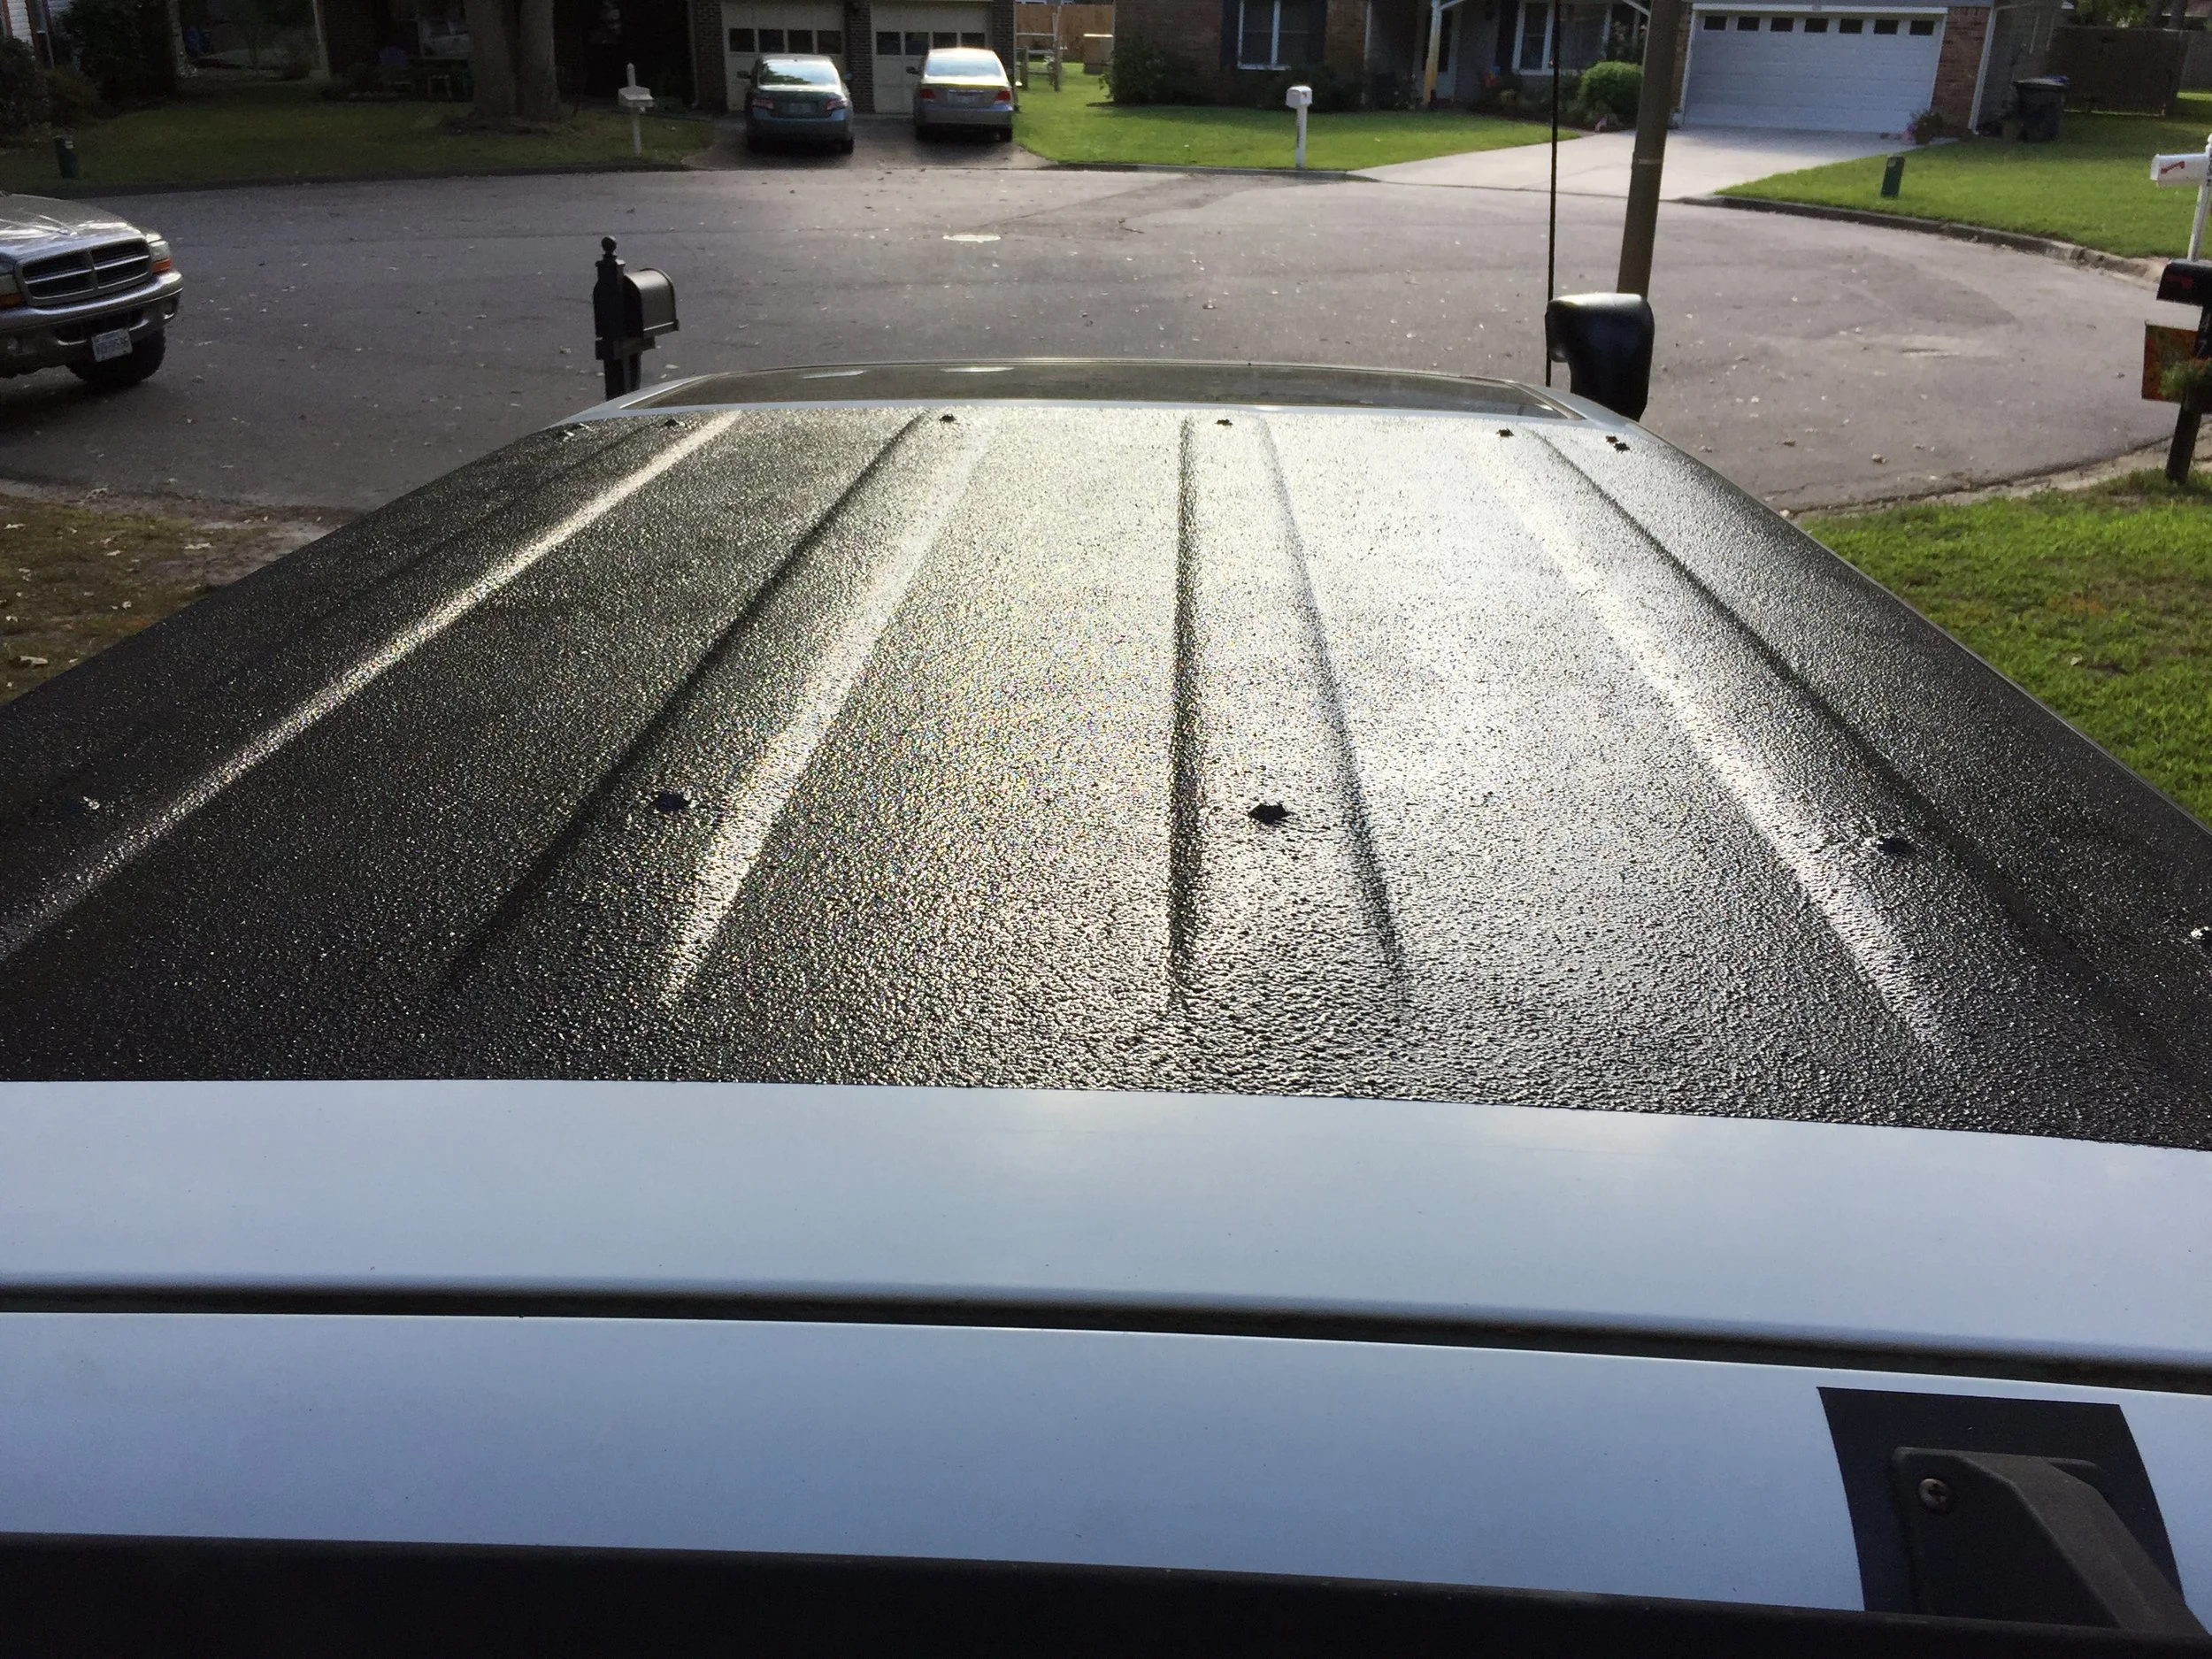
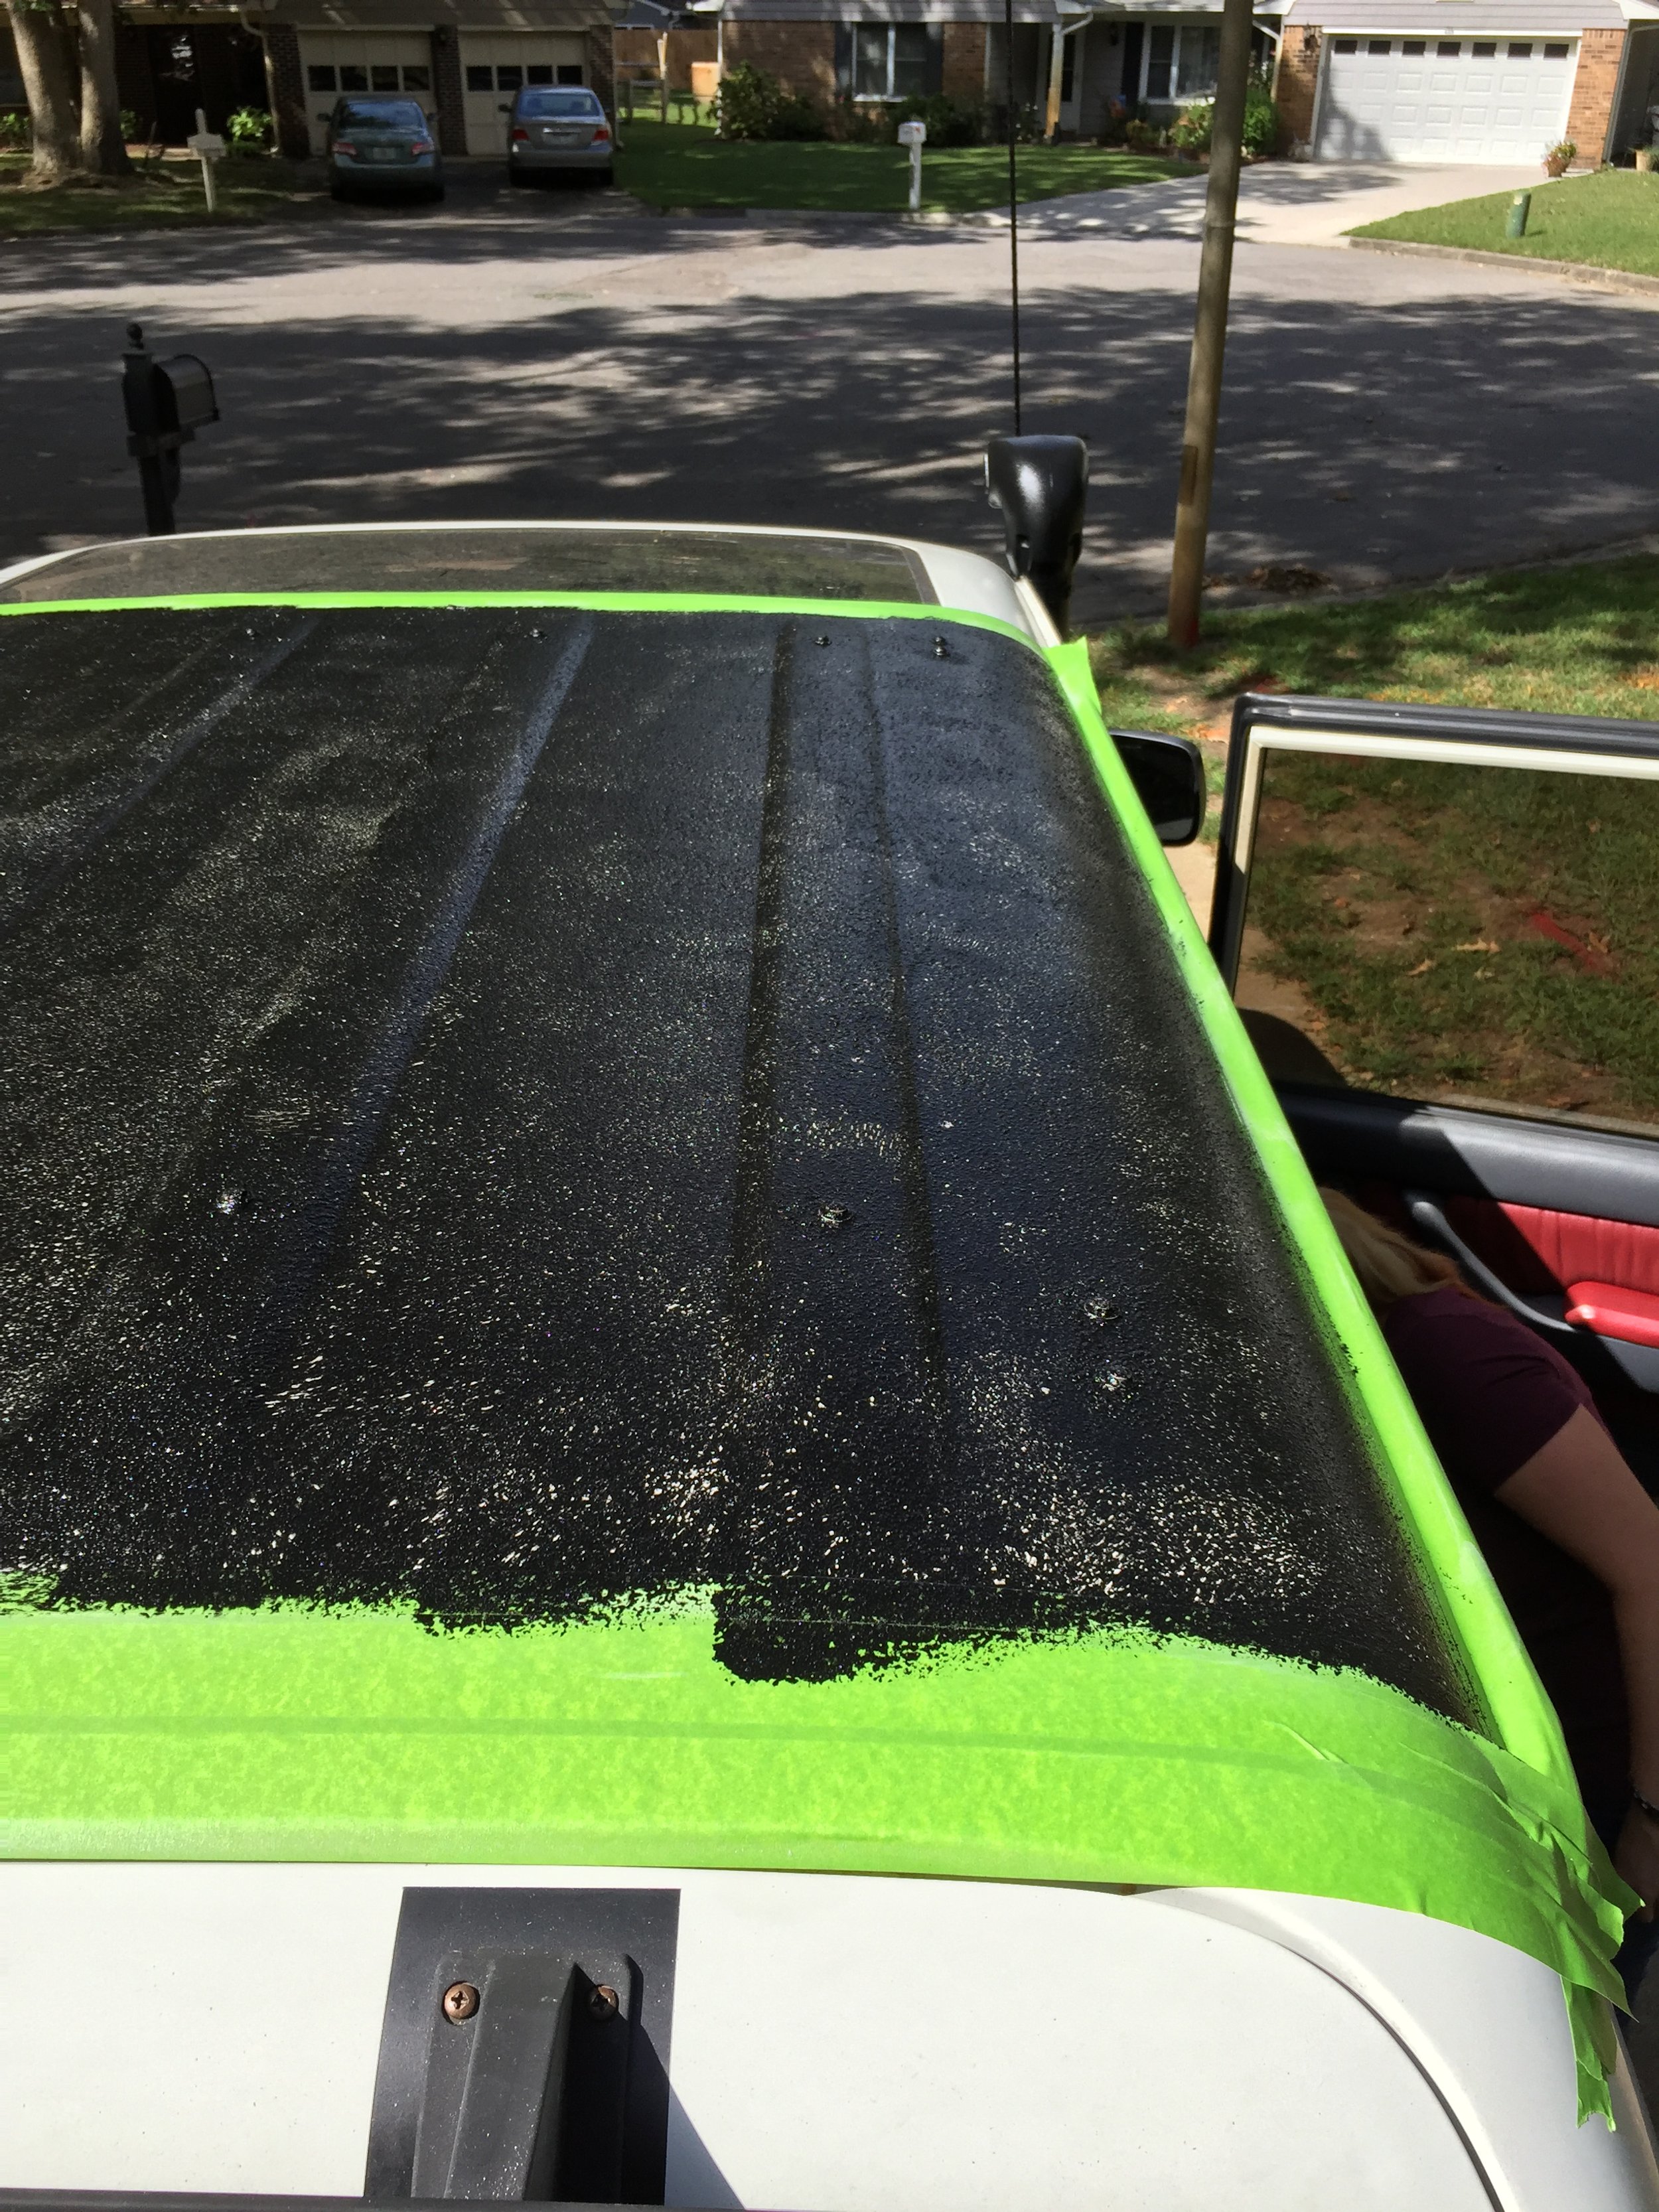
We wanted a sturdy roof rack to carry our gear, but didn’t want the huge safari style rack that everyone was installing from ARB. There’s nothing wrong with that rack of course, but it wasn’t what we were looking for. We wanted a low profile rack and this was long before the days of Prinsu and Front Runner. Searching high and low until finally one day I found a member of IH8MUD that was making exactly what we were looking for right in his own garage. It took several weeks for it to arrive, so we began to prep the roof of the Cruiser by removing the factory roof rack, repairing the corrosion, plugging the fastener holes and sealing the roof with a protective coating of bedliner. This ensured that any straps or gear that made contact with the roof would not wear away the paint and cause it to rust again. While we waited we also had time to install our newly purchased Old Man Emu 2.5” lift kit with heavy duty load springs for the rear.

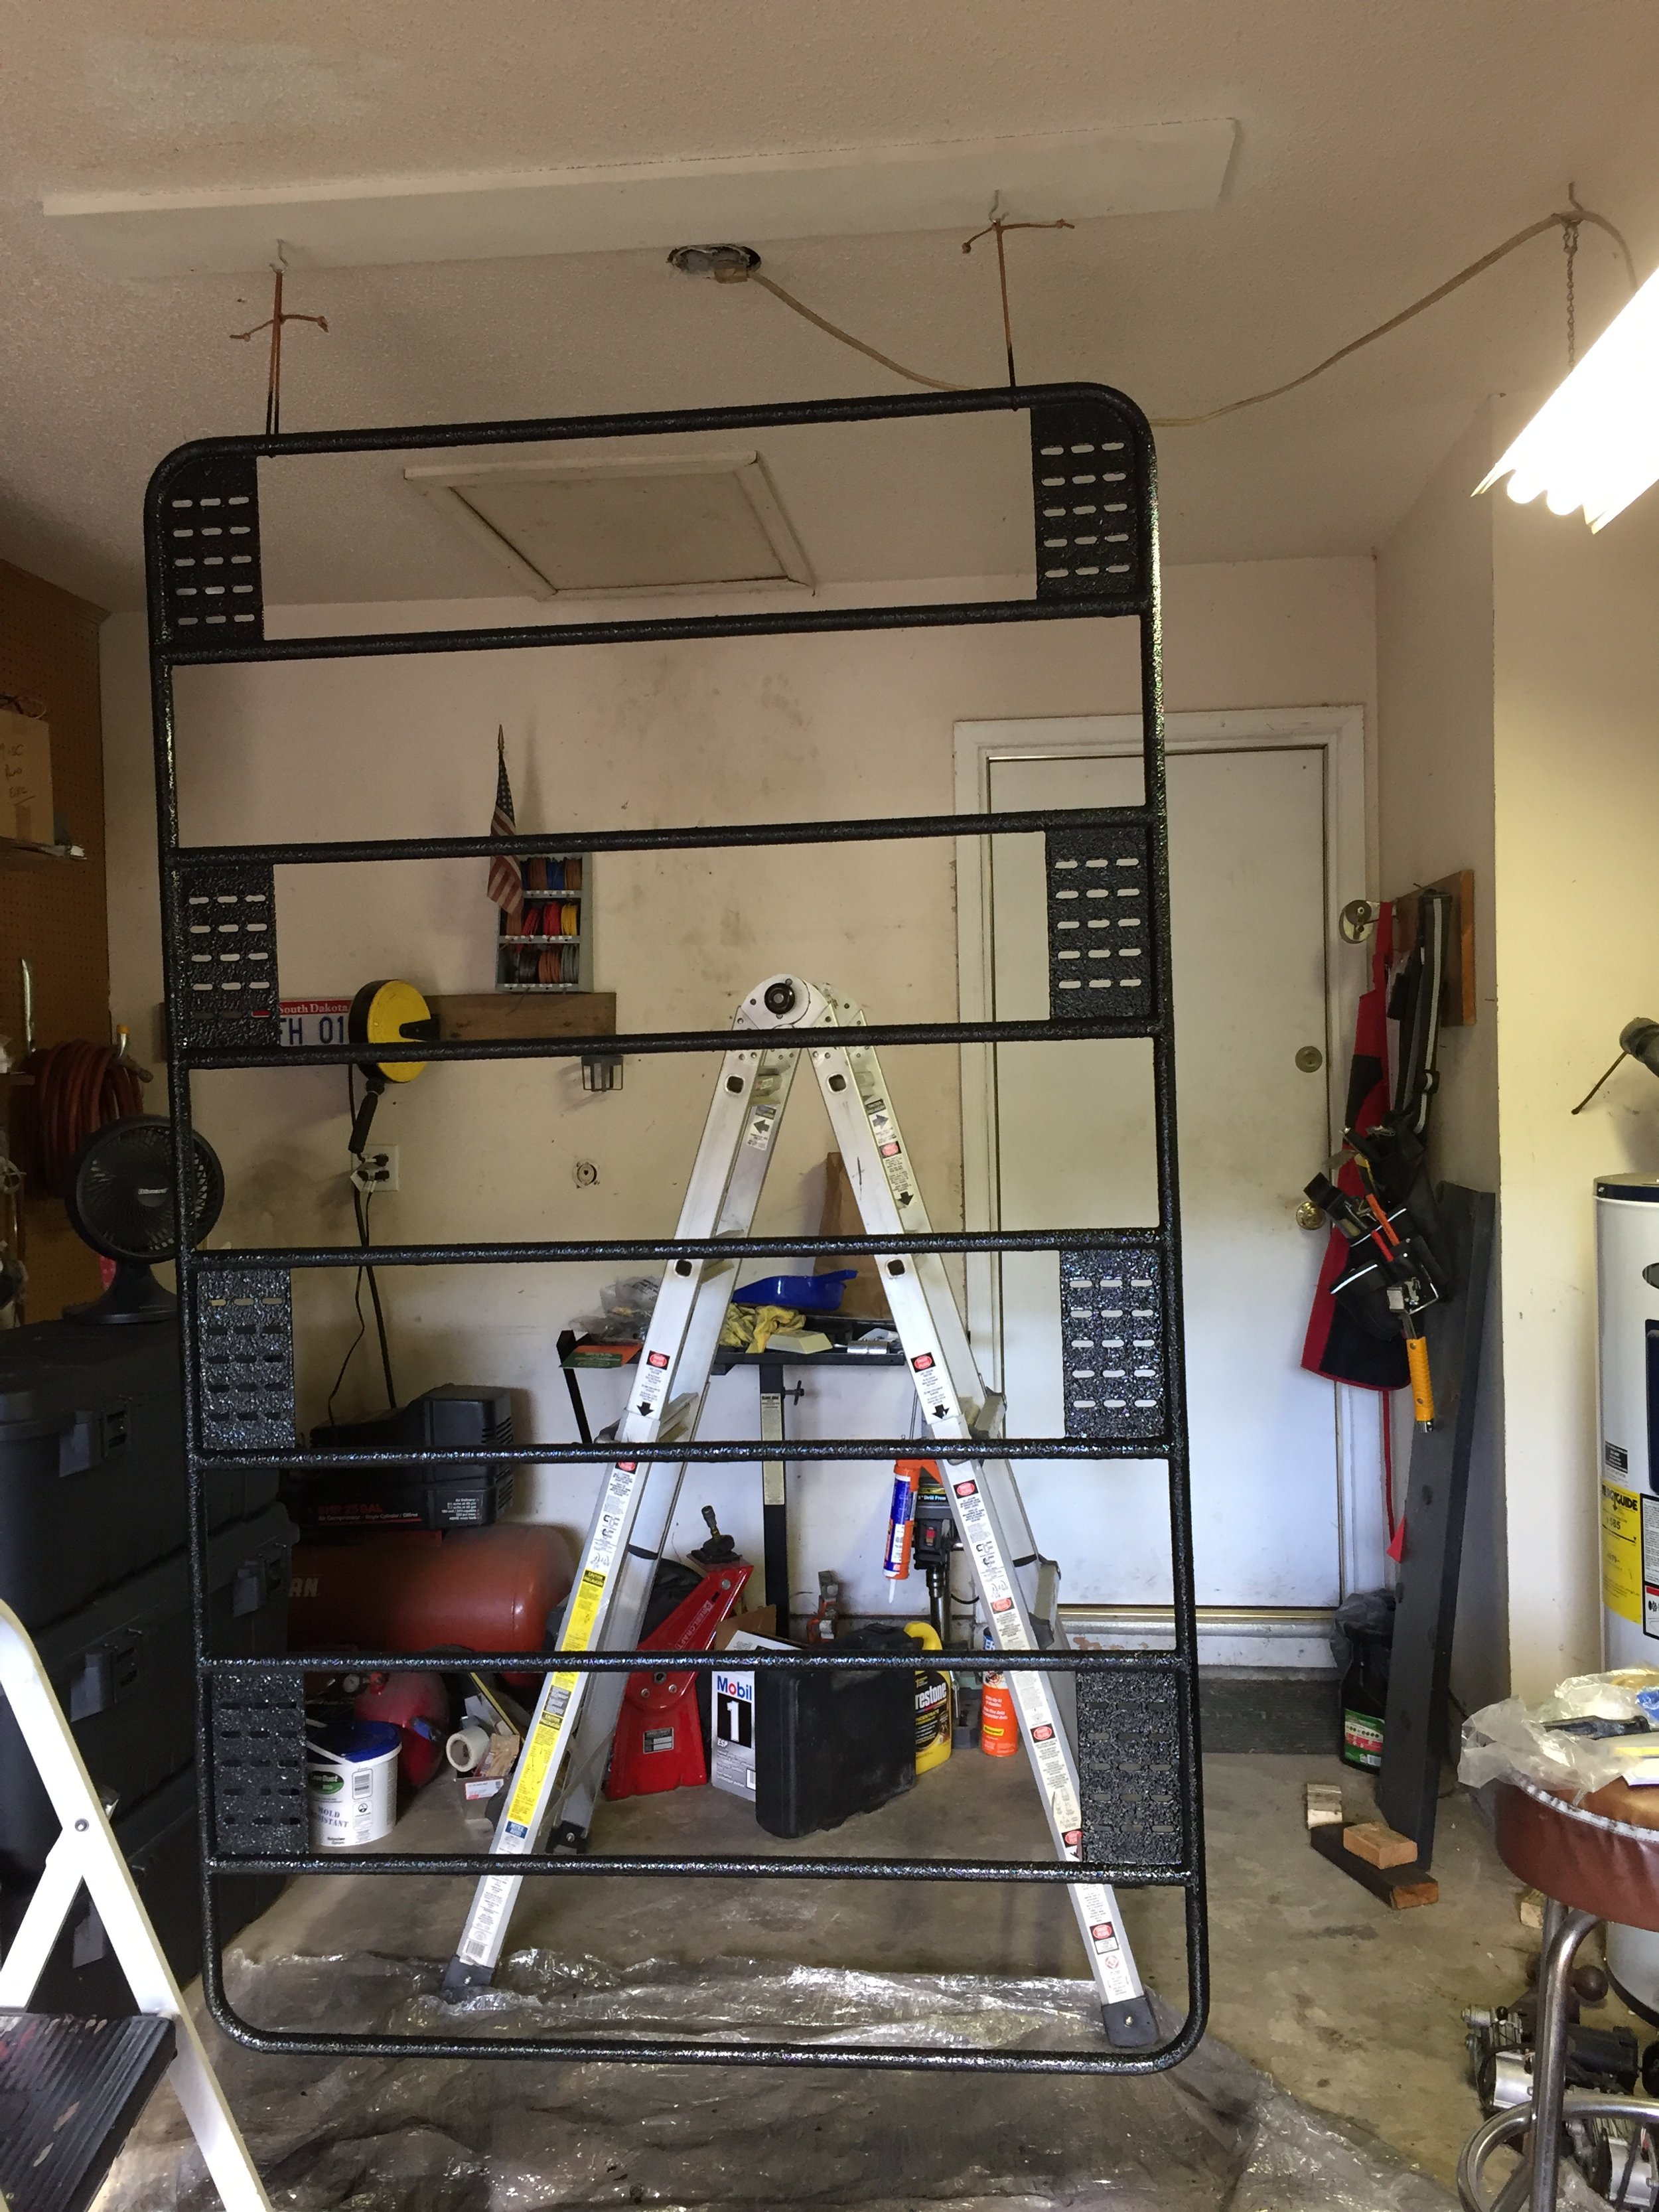
A few weeks later, our custom built roof rack from Gamiviti showed up on our door step. We chose to order the rack in bare metal to save a few bucks and coated it ourselves with bedliner. That turned out to be a mistake years later as we found the hooks of the tie downs and the feet on the boxes ended up wearing through the bedliner. If we had it to do all over again, we would’ve just ordered the powder coated one from Gamiviti, since ended up having to strip ours down and have it powder coated locally. Lessons learned.

On now to some organization. As we quickly learned with our Durango, it’s no fun trying to find something when your gear has been rolling all around the back end of your vehicle. To help control this we did what everyone was doing at the time and built a drawer system. Using plywood, killz paint and outdoor carpeting from Home Depot, we constructed our very basic drawer system. It worked okay, but how we modified it later was a game changer and still my favorite setup to date. More on that later.


After a weekend of camping in non-stop rain had destroyed our old ground tent, we chose to go a different route for shelter. We purchased a rooftop tent and a matching annex room from a new company out of Bend, OR named Freespirit Recreation. After all, it was the newest trend to hit the states and no one we knew had ever even seen one. It sounded like a fun thing to try.


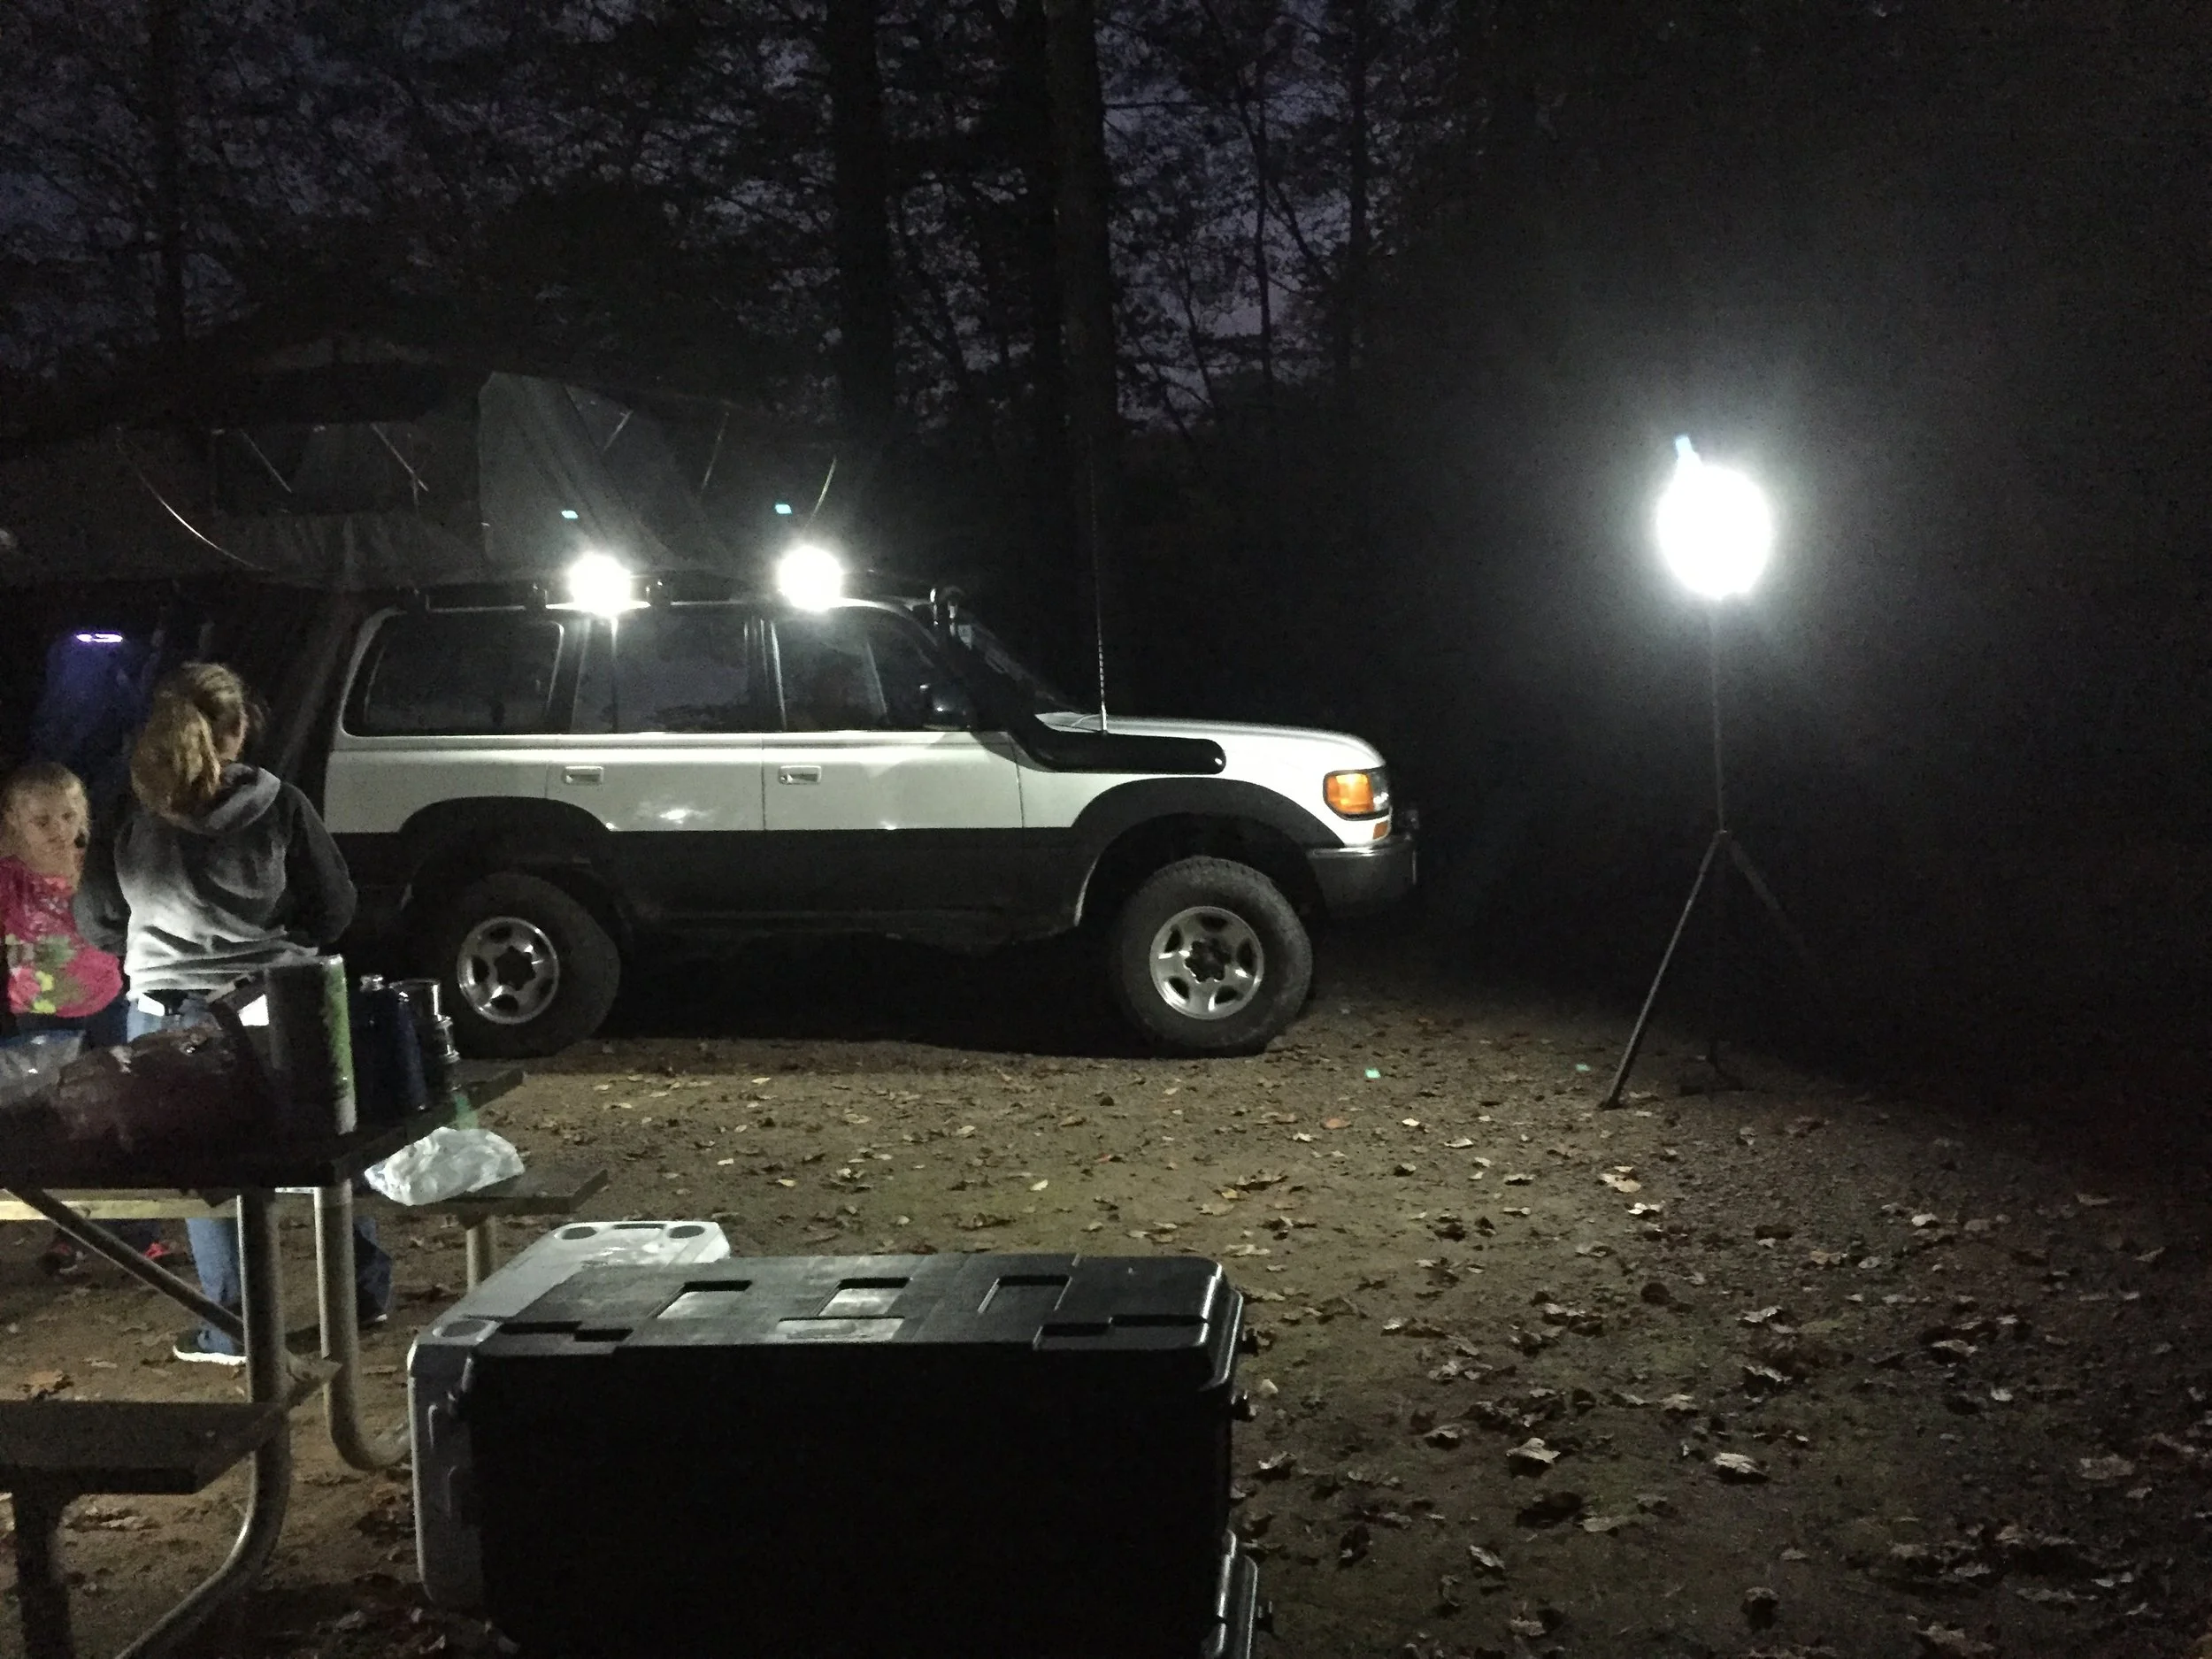
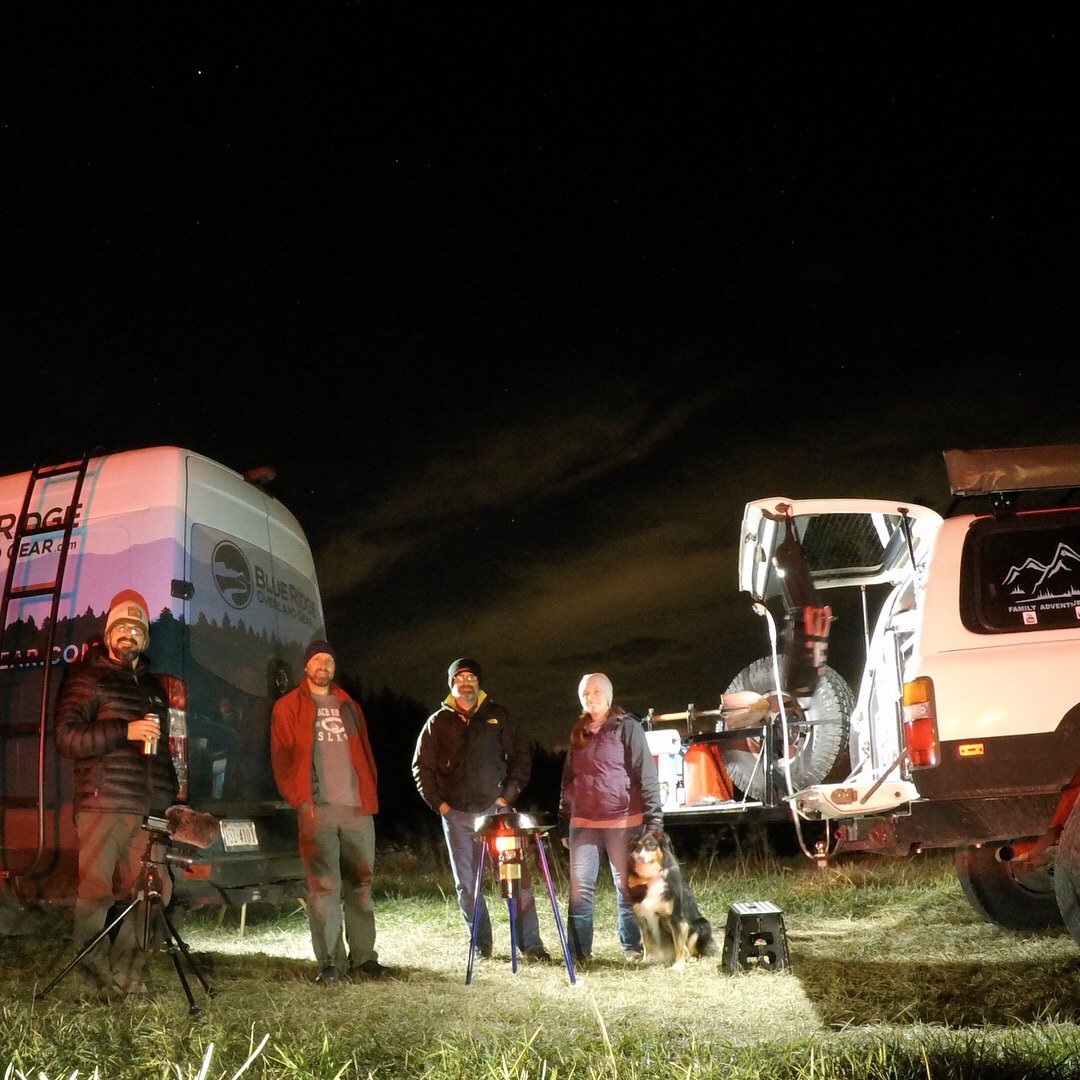
With the tent installed and the back loaded full of gear, we took the Cruiser out on its maiden voyage. Nothing crazy as we were attending the Roanoke Go Festival in Roanoke, VA and staying at a near by campground. But we did have a couple of firsts that weekend. It was our first trip in the Cruiser, first time sleeping in a rooftop tent, first time meeting Matt and his family from Blue Ridge Overland Gear as well as Jason and Gabby of Mountain State Overland and our first time exploring in the Roanoke area.


With the Cruiser performing flawlessly on its maiden voyage, we began to plan our next trip almost as soon as we got back home. However, this next trip required some new additions to the rig as Jennifer and I had never been anywhere like this before. South Core Island, also known as Cape Lookout, NC is a barrier island on the Atlantic coast. The only way to and from the island is by ferry. Once on the island you have to be self sustaining as there are no services for fuel, food and so on. This meant we needed to carry more water with us, plan for inclement weather and have a fuel reserve for a thirsty 1994 dinosaur. Not knowing what to fully expect, we did what anyone would do. We over compensated.
We started by building Jerry can holders for the roof of the vehicle. This allowed us to carry 10 extra gallons of fuel and 14 gallons of water. It worked great except for one major flaw. Do you know how much that quantity of fuel and water weighs? Neither did we and we learned that lesson quickly. This and one other trip were the only ones that we made with these mounted to the roof rack of the Cruiser. 10 gallons of fuel and 14 gallons of water weighs somewhere around 177 pounds. To say we had body roll would be an understatement!


The next item we installed was our dual battery setup. We purchased a diesel 80 series battery tray for the passenger side and installed a secondary battery. The main battery was connected to the secondary battery via a bluesea ACR (automatic charging relay). This connected the two while the engine was running and automatically disconnected when the main battery voltage dropped below 13v. From there we ran power to the rear of the cruiser and installed a 1000watt inverter so we could charge our camera and our phones.


Finally, we removed the roof basket from our Durango and modified it to fit the Land Cruiser so we could carry our sleeping bags and recover gear inside two Plano boxes. With the preparations done, we embarked on our trip fully prepared. Or so we thought.


The weather was perfect through out the day as we enjoyed the beach and explored the island. As soon as night fell and we turned in for the evening, the winds picked up and we began to feel the tent starting to lift up at the hinge. Hopping down from the tent to secure the guy lines I noticed that the winds were continuing to pickup and that the tent was trying to lift and fold back up on itself. Checking the weather radio in the cab of the Cruiser, Jennifer and I discovered that we were now under a Gale force wind warning. We quickly decided to evacuate the kids and the dog from the tent and get everyone inside the Cruiser for safety. Once all of our things were inside, Jennifer and I began the tedious task of trying to close a rooftop tent in between the 30-50mph gusts. After securing the tent, we joined the kids in the cab of the Cruiser and endured a night of rocking back and forth from the battering winds. The picture below was taken shortly after waking up from a collective 2hrs of sleep and to a beautifully calm sunrise.

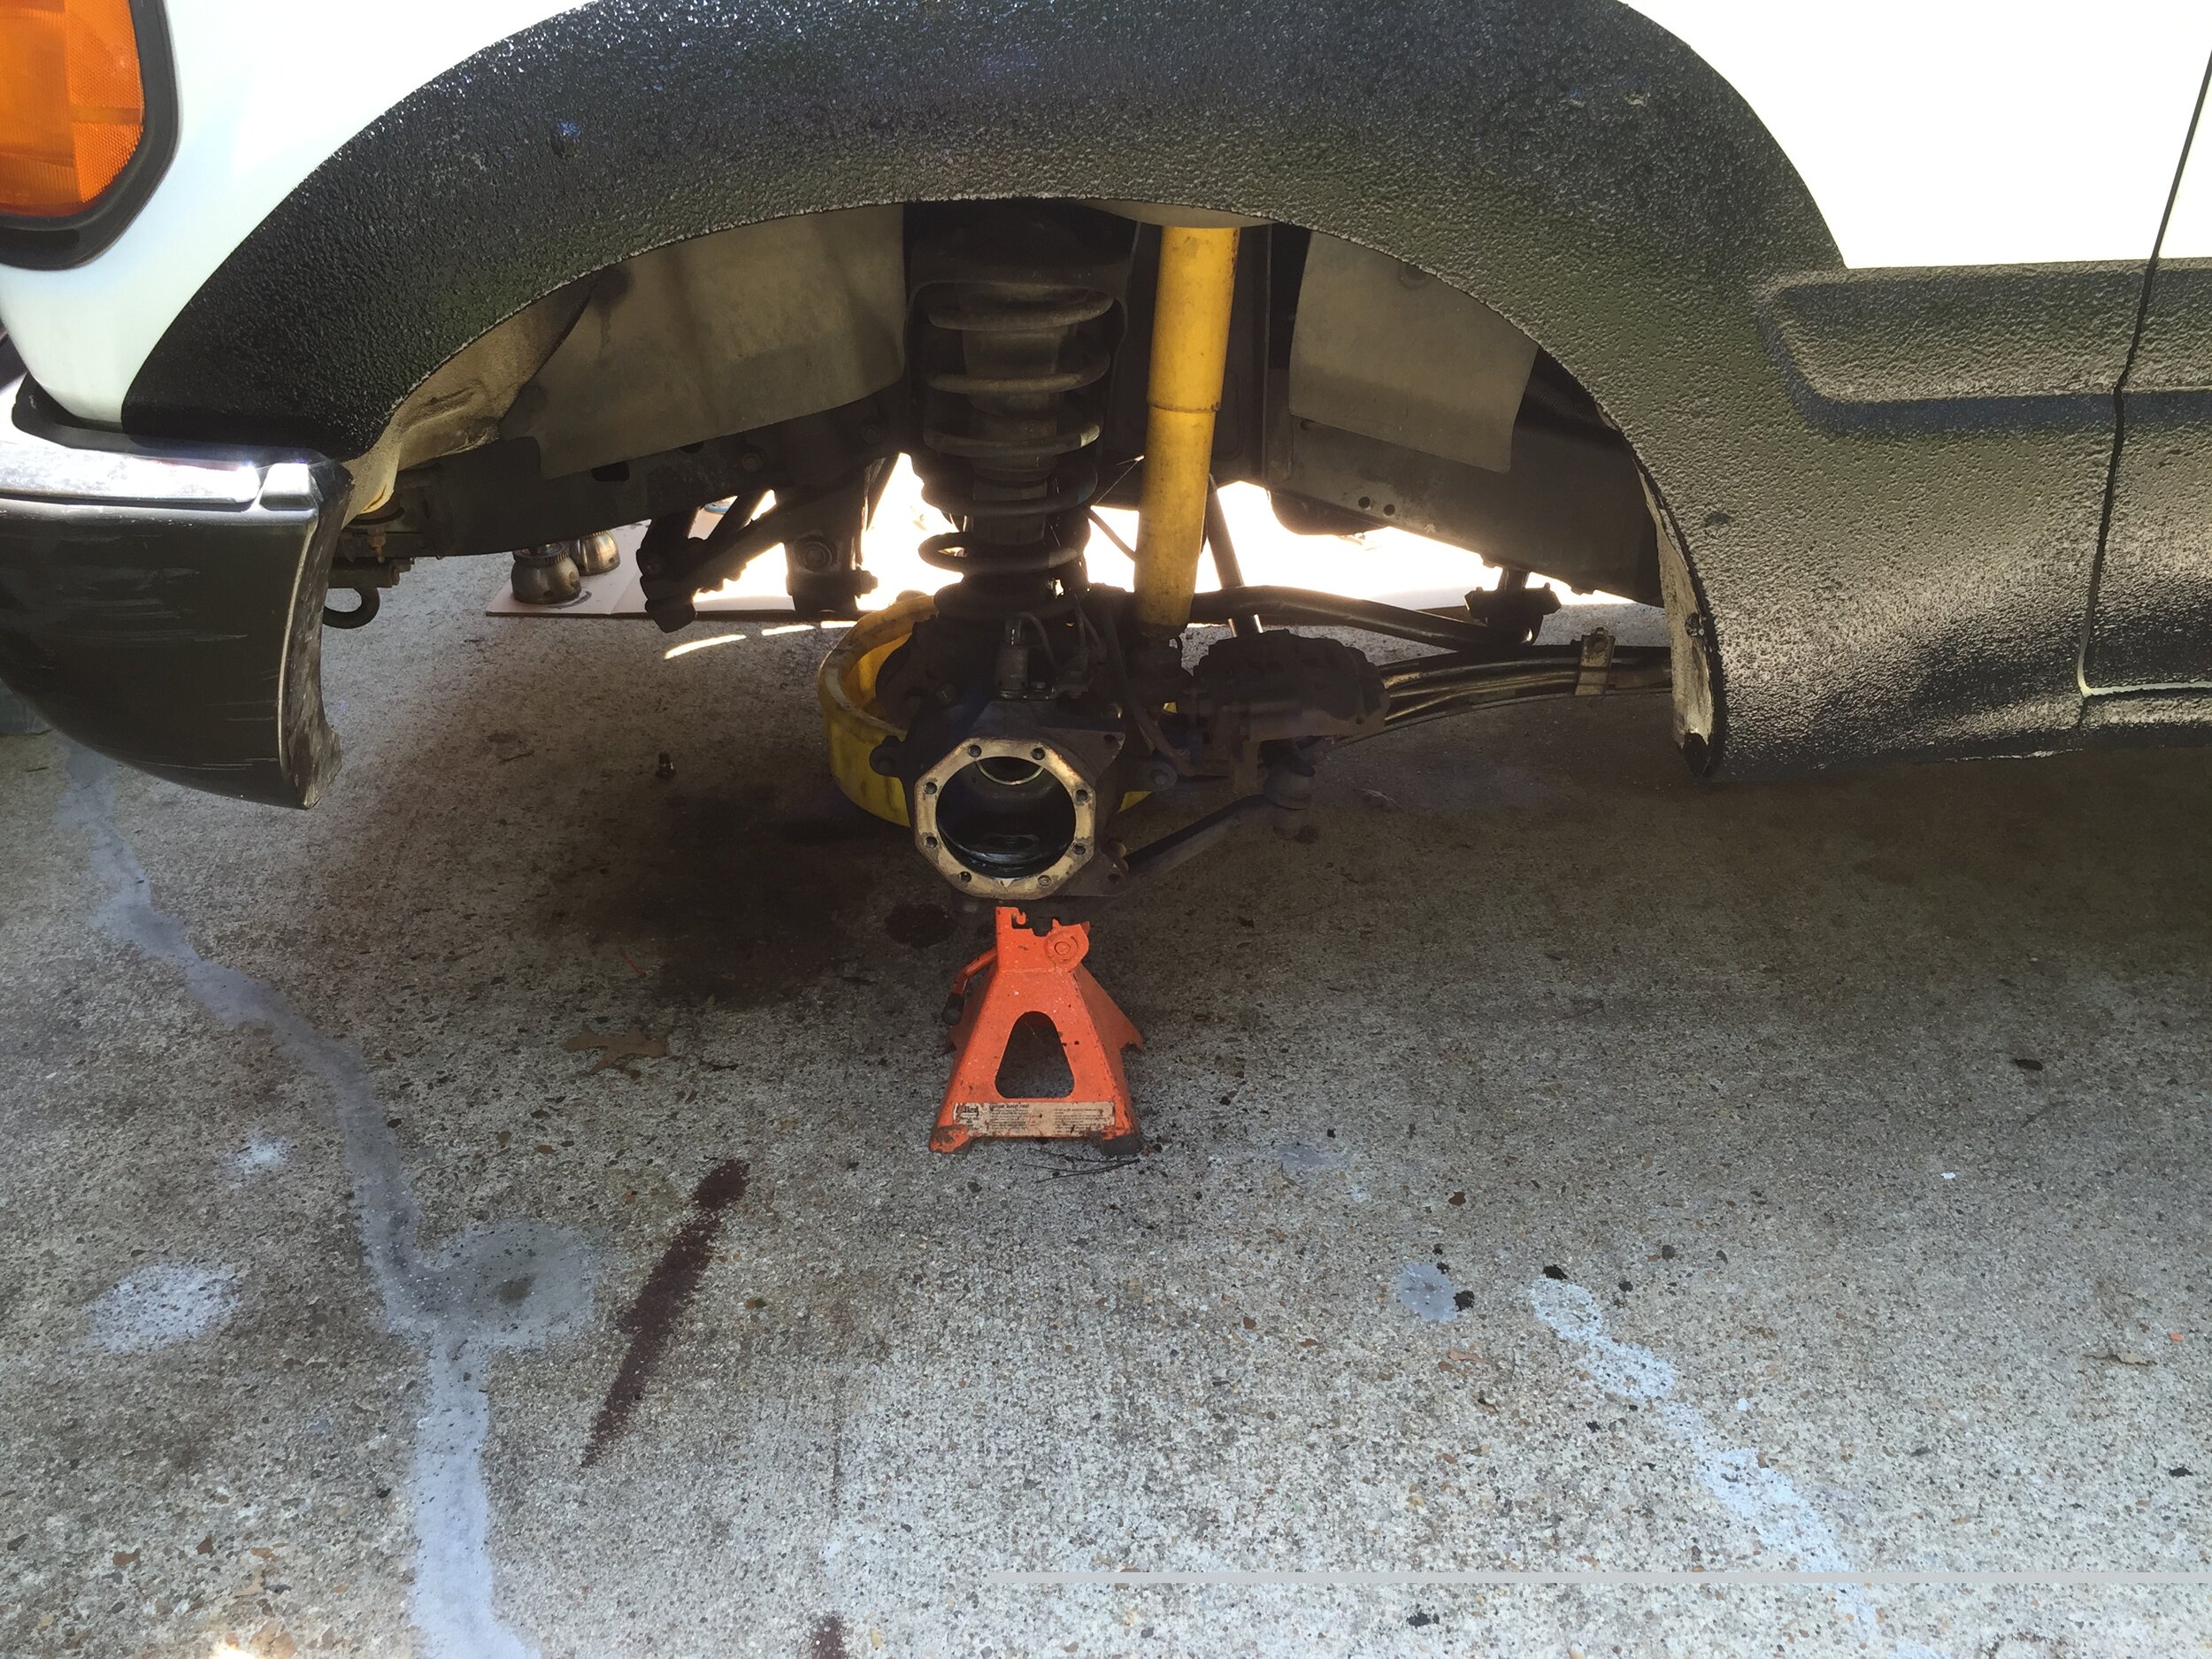
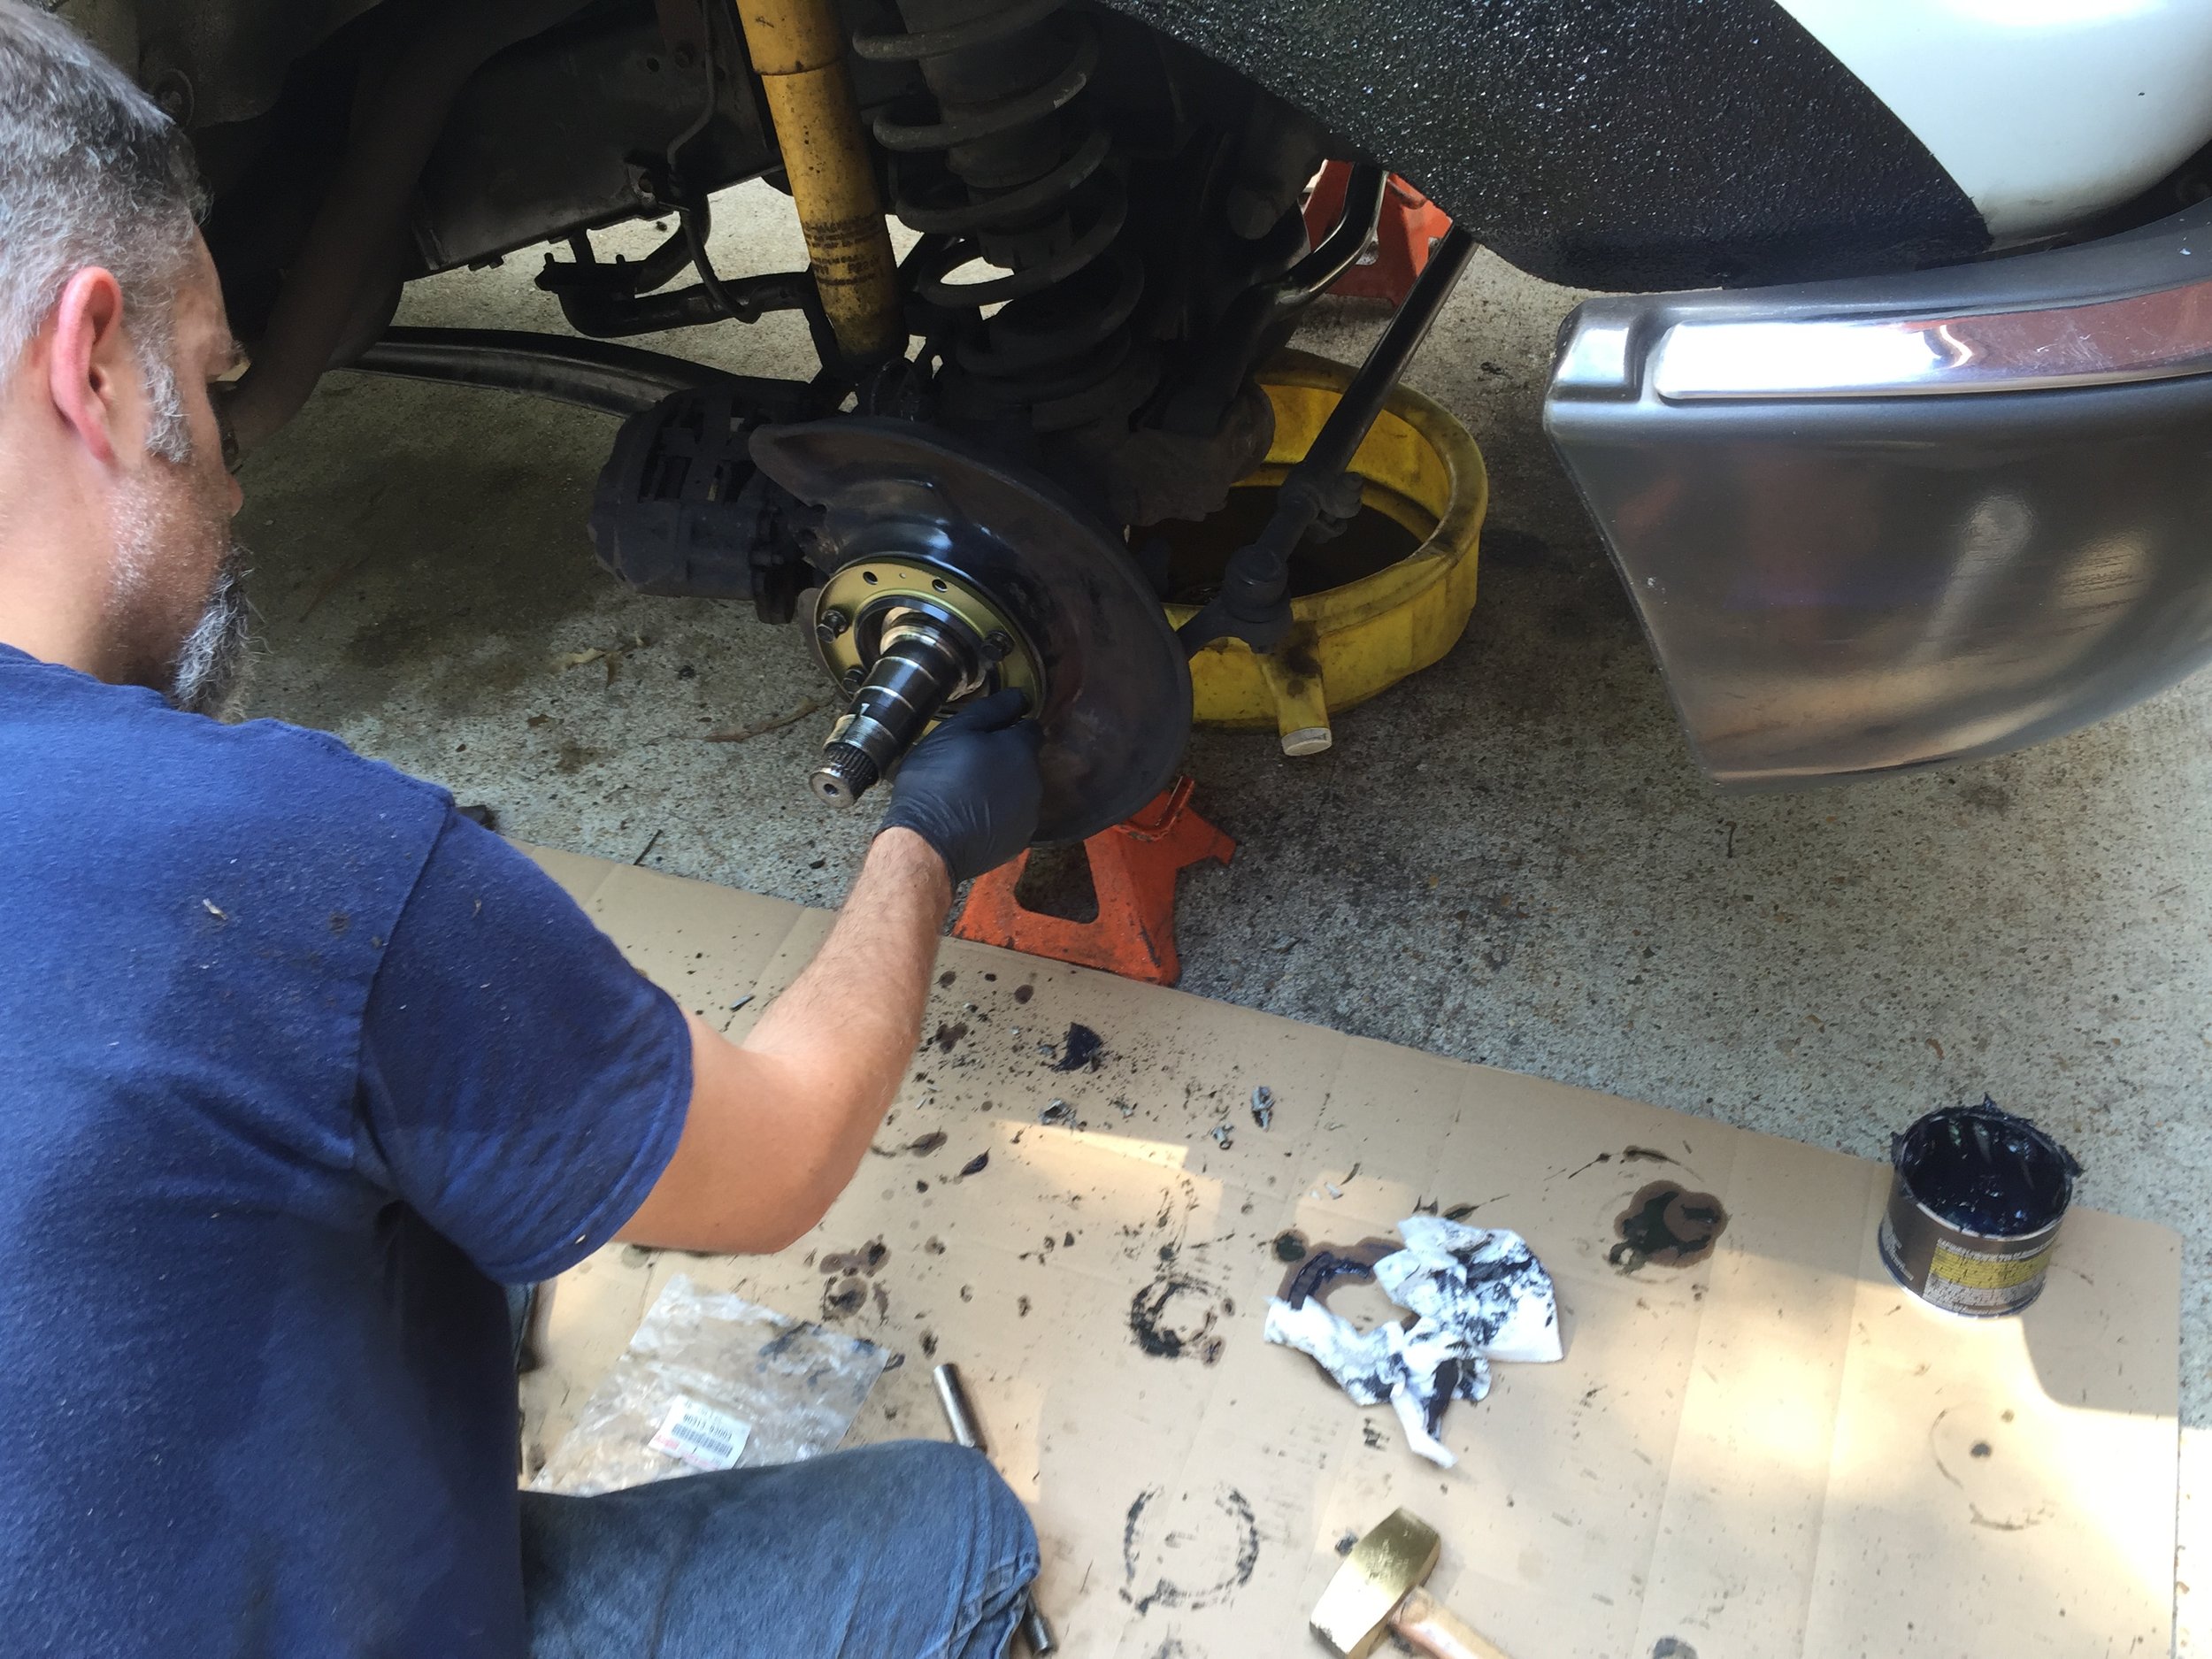
Returning from our trip at Cape Lookout, we immediately got after some issues that we had identified while on the island. The 31” tires that came on the Cruiser were definitely insufficient in the soft sand and we had also noticed that there was a clunking noise coming from the suspension over some of the washboarding. We stared by replacing the smaller Yokohama Geolanders with a set of 315/75r16 Toyo AT2 Extreme tires. Next, we located the clunking noise and discovered that we had a blown bushing in one of the suspension links. Not wasting any time, we order up a complete set of OEM bushings from Toyota and a set of caster correction bushings for the front axle from Slee off-road. As soon as the parts arrived it was back to the workshop to get them all installed. What a difference all of this made! The feel tightened up and the ride was absolutely amazing. We should’ve done this from the start.


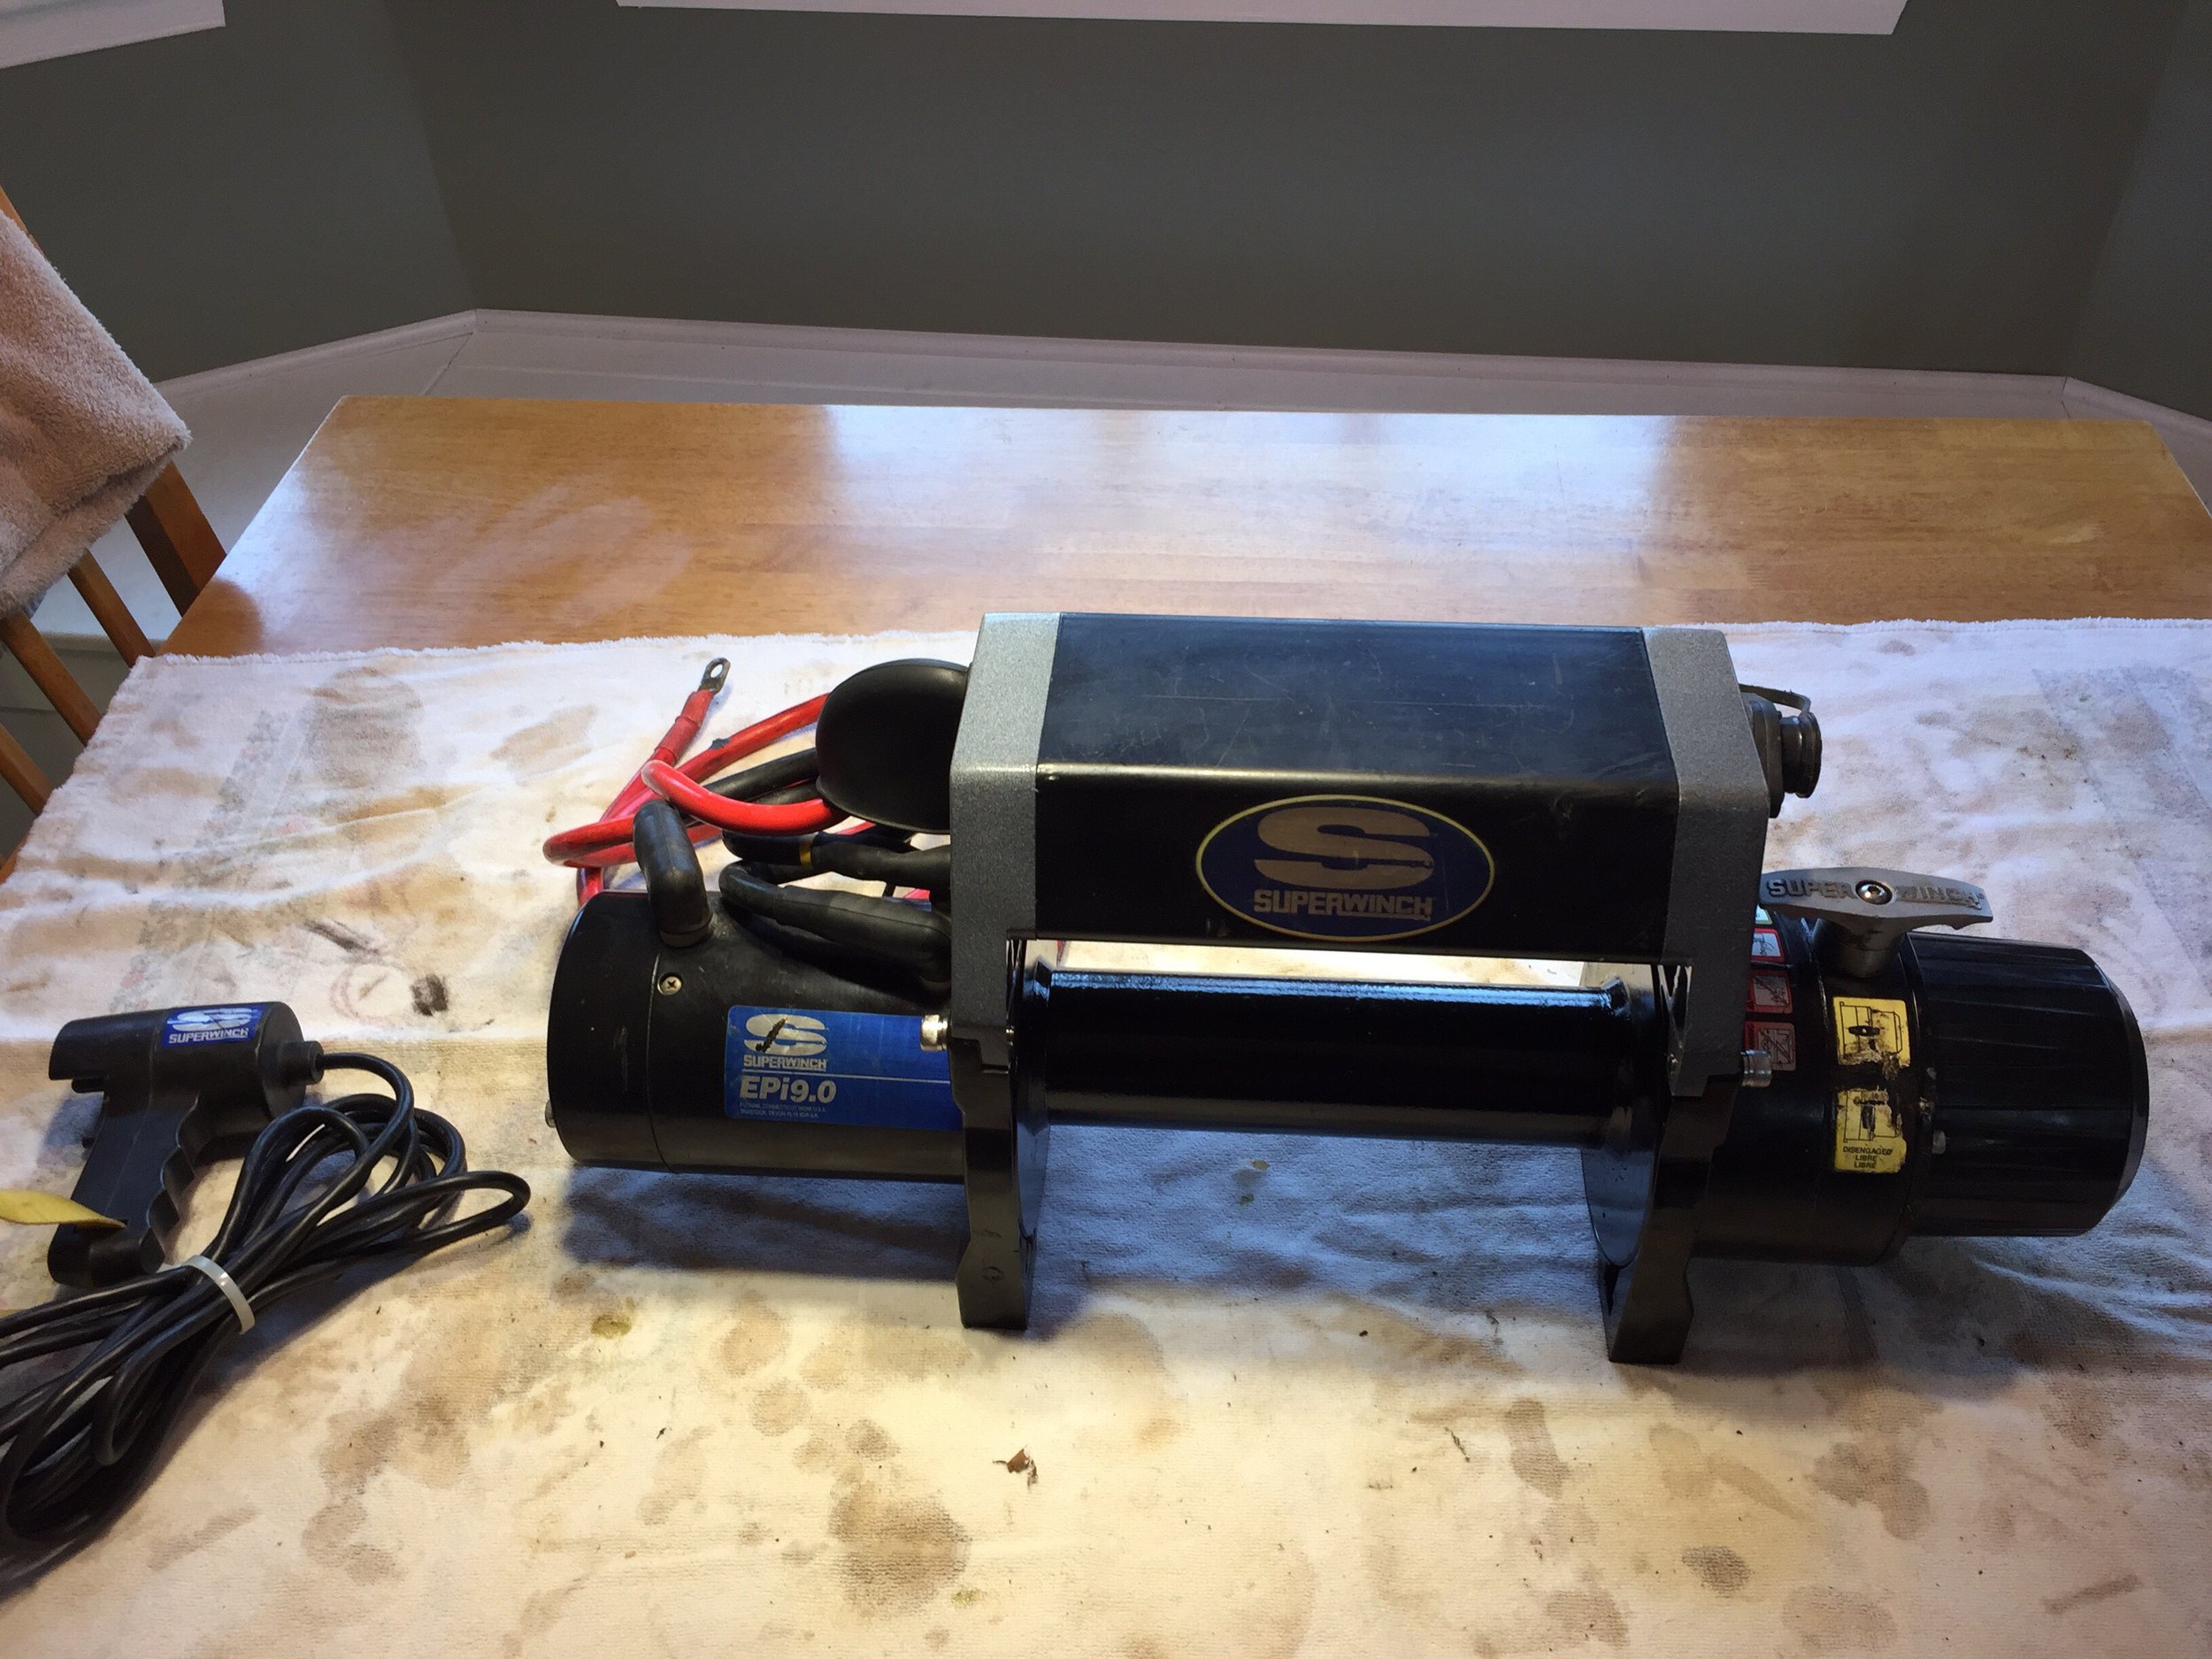
Our next modification to the Cruiser came about because of a deal we got on a winch. It’s funny how getting a deal on one thing always leads to spending a lot of money on other things. Anyway, we found a Epi9.0 SuperWinch on Facebook marketplace that was listed for $200. After going to look at it and discovering that the motor wouldn’t run and the support plate for the drum was broken, we offered the guy $100 for it and decided to take our chances. It payed off as we were able to get a new support plate from SuperWinch and fix a loose contact at the solenoid. All and all, we had $250 into the winch.


Of course we still needed something to bolt the winch to. So we started planning out a front bumper build, which quickly died when we found out Trail Gear was running a sale on their rock defense fj80 front bumper with stinger. $600 and a week later we had our new bumper in hand. As you can see from the first picture below, the body on the 80 series hangs down in front of the front tires. To get as much clearance as possible, the corners need to be chopped and the receiver dryer needed to be repositioned. This is a very common modification to the 80 series and you can read more about it oh IH8MUD.com if you’re interested in doing it. The one thing that we want to caution you about if you perform this mod is to watch out for the transmission cooler lines that run in the body area of the driver front corner. We managed to knick one with our sawzall when we did the chop and had to clean up a big mess as well as replace the line. In the close up picture below, you can just make out the hose sitting in the back opening of the body. Another lesson learned.


With the chop all done, we did a test fit of the bumper and welded some light tabs to the upper hoop. Then we dropped it off for powder coating and ran the electrical for the winch and lights. With the bumper back on, we couldn’t help but notice how this one change completely changed the attitude of the Cruiser.


Out of all of the modifications that we’ve ever done to the Land Cruiser, this one has to have been the best. It may surprise you too. The stock 80 series Land Cruiser comes with a measly 80amp alternator. This becomes very apparent when the lights are on and you switch on the turn signals, A/C or attempt to roll up a power window. You can literally watch the amp gauge move and the dash lights dim. This issue plagued us for some time until we discovered another member on IH8MUd that goes by Photoman. This particular member came up with a kit to adapt a 130-150 amp Tundra or Sequoia alternator to the 1FZ-FE inline 6 engine. This one upgrade got rid of all of our electrical problems while allowing us to support the winch and the upcoming modifications to the rear of the Cruiser. We’re not sure if he still makes the kit, but if he does it’s worth every penny and we highly recommend getting it! Here’s the link to the forum post: Alternator upgrade


After saving up some money and growing very tired of dealing with coolers and melted ice, we were ready to take the leap into the world of 12v refrigerators. Little did we know that this leap would result in our favorite outdoor camp setup to date. After constructing a base plate and bolting it to the third row seat anchors, we utilized the same drawers that were in the back of the Cruiser and chopped 4 inches off of the shorter one so it fit while stacked on top of the other drawer. This opened up the necessary amount of room for the new Tembo Tusk fridge slide and Snomaster 65D 12v dual zone fridge/freezer that we were installing. To further utilize all of the space in the cargo area, we encased the fridge and modified a cheap Petco pet barrier to fit the front of the drawers to prevent gear from shifting or launching into the passenger compartment. The 120v inverter and fuse box was relocated to the front lower portion of the drawers directly behind the passenger rear seat for easy access.


What does $600 worth of 3/16” boxed steel, 1/4” square tube, 1/4”angle iron and a heavy duty spindle add up to? An overkill bumper! It was finally time to add the last major piece to our puzzle. The only issue was, we couldn’t find one that did exactly what we wanted. As you all know by now, Jennifer loves to cook and this bumper was going to be an integral part of the rear camp kitchen. Taking our cues from the 4x4Labs bumper, we cut 4” from the rear bumper/frame structure. This would bring everything nice and tight up against the body. Starting with a 6x2” beam mocked up at the height we wanted, we started to devise a plan for the bumper. We knew that we wanted a single swing arm with a drop down table and a built in receiver hitch for more ground clearance. The swing arm also needed the ability to lock at 90 degrees and 120 degrees to make the best use of the rear while the fridge was slid out. We were pretty fluid on everything else and let the process unfold as we went along. It probably wasn’t the best way to build a bumper but it turned out exactly how we wanted it and we wouldn’t have changed a thing about it. To wrap everything up, we had the bumper powder coated the same as the front bumper and installed a plastic food grade top to the flip down table. We also installed some LED lights in the upper tailgate to light the camp kitchen at night.


With the addition of the fridge to the back, we wanted to add solar to keep our battery charged at camp. The main issue was that we didn’t have anywhere to mount it. We used a portable panel for a while, but often forgot to set it up. Finally one day we came up with a crazy idea. The next thing you know, we had an 80watt solar panel bolted to the top of our hood. It worked exactly as we’d hoped and we never worried about the fridge killing our battery again. It was also quite the conversational piece on several occasions!


Over the years, there were tweaks, revisions and a couple of different tents. But honestly, there’s not much to talk about with those. What we’ve just shared with you was our Land Cruiser in its prime. We hope you’ve enjoyed learning about the Cruiser and how we chose to build it out. In closing, below are some pictures from some of our most memorable adventures with our Cruiser.