The Find
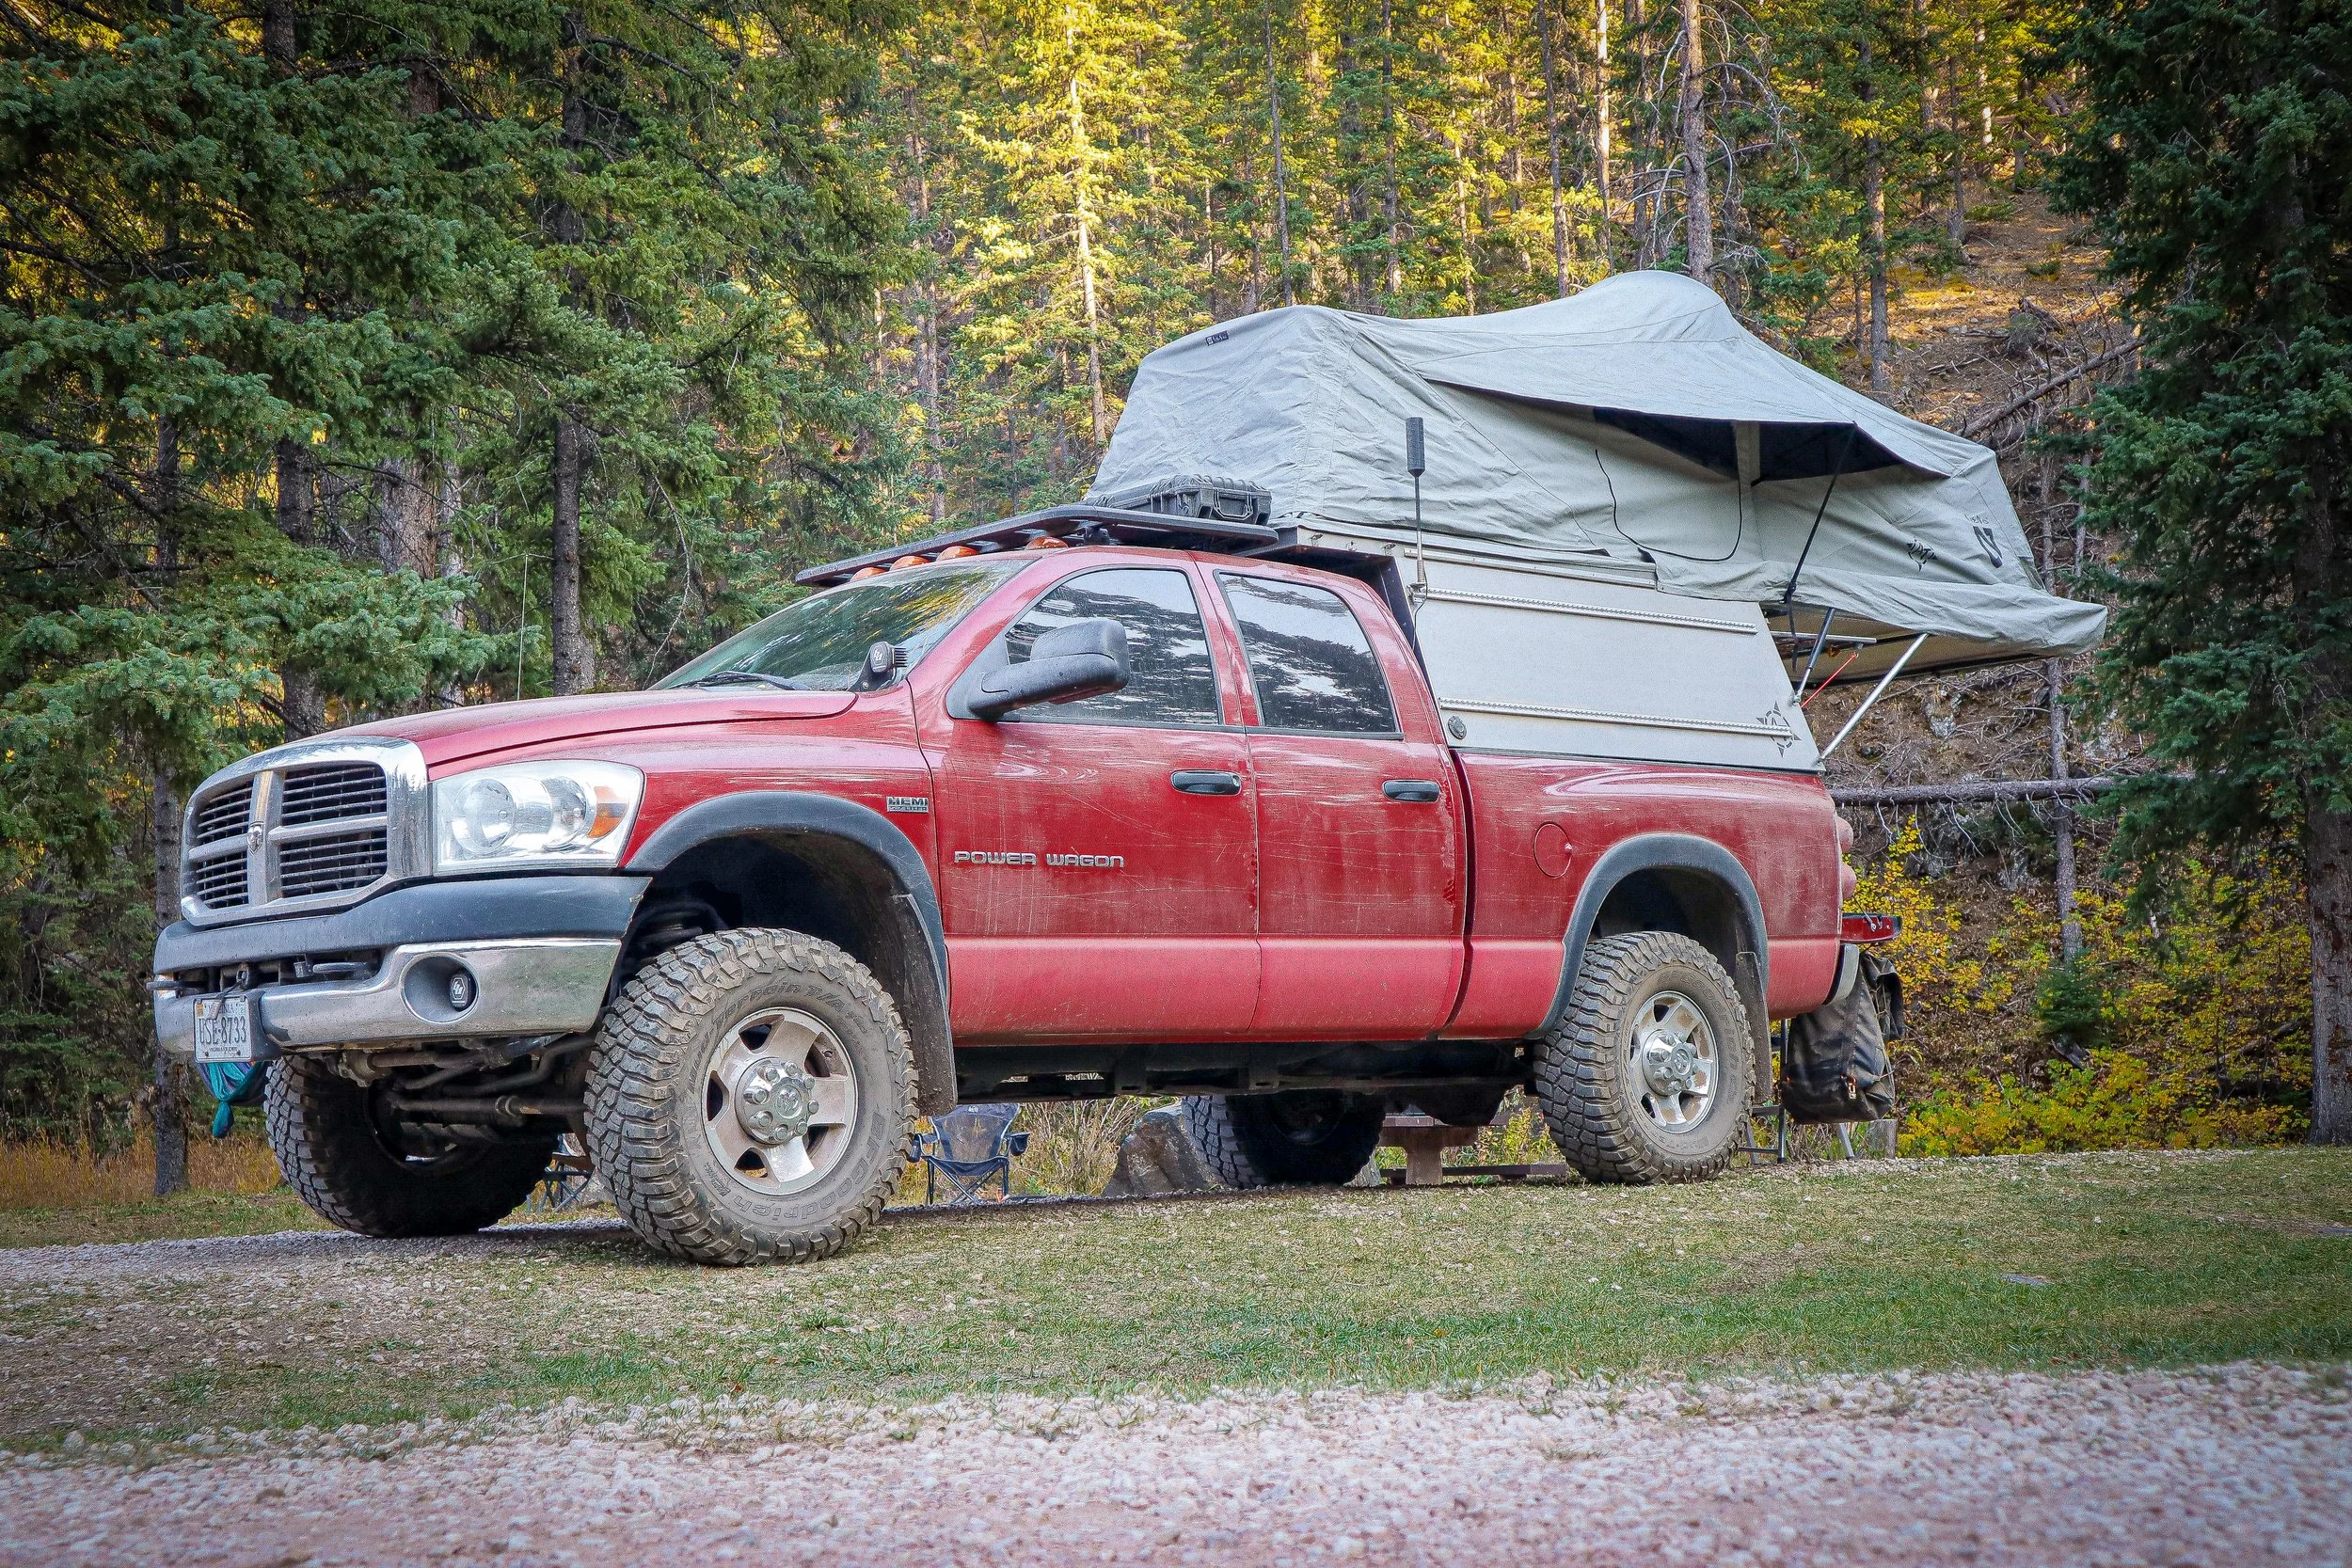
We were lucky enough to find our 2007 Dodge Power Wagon here locally in Virginia. It was a two owner truck with 167k miles on the clock. The previous owners were brothers, one being the original purchaser of the vehicle brand new from the Dealership. Both had cared for it meticulously and the exterior and interior showed it. Mechanically, it had the usual issues you’d expect from a high mileage vehicle.

fortifying the Foundation
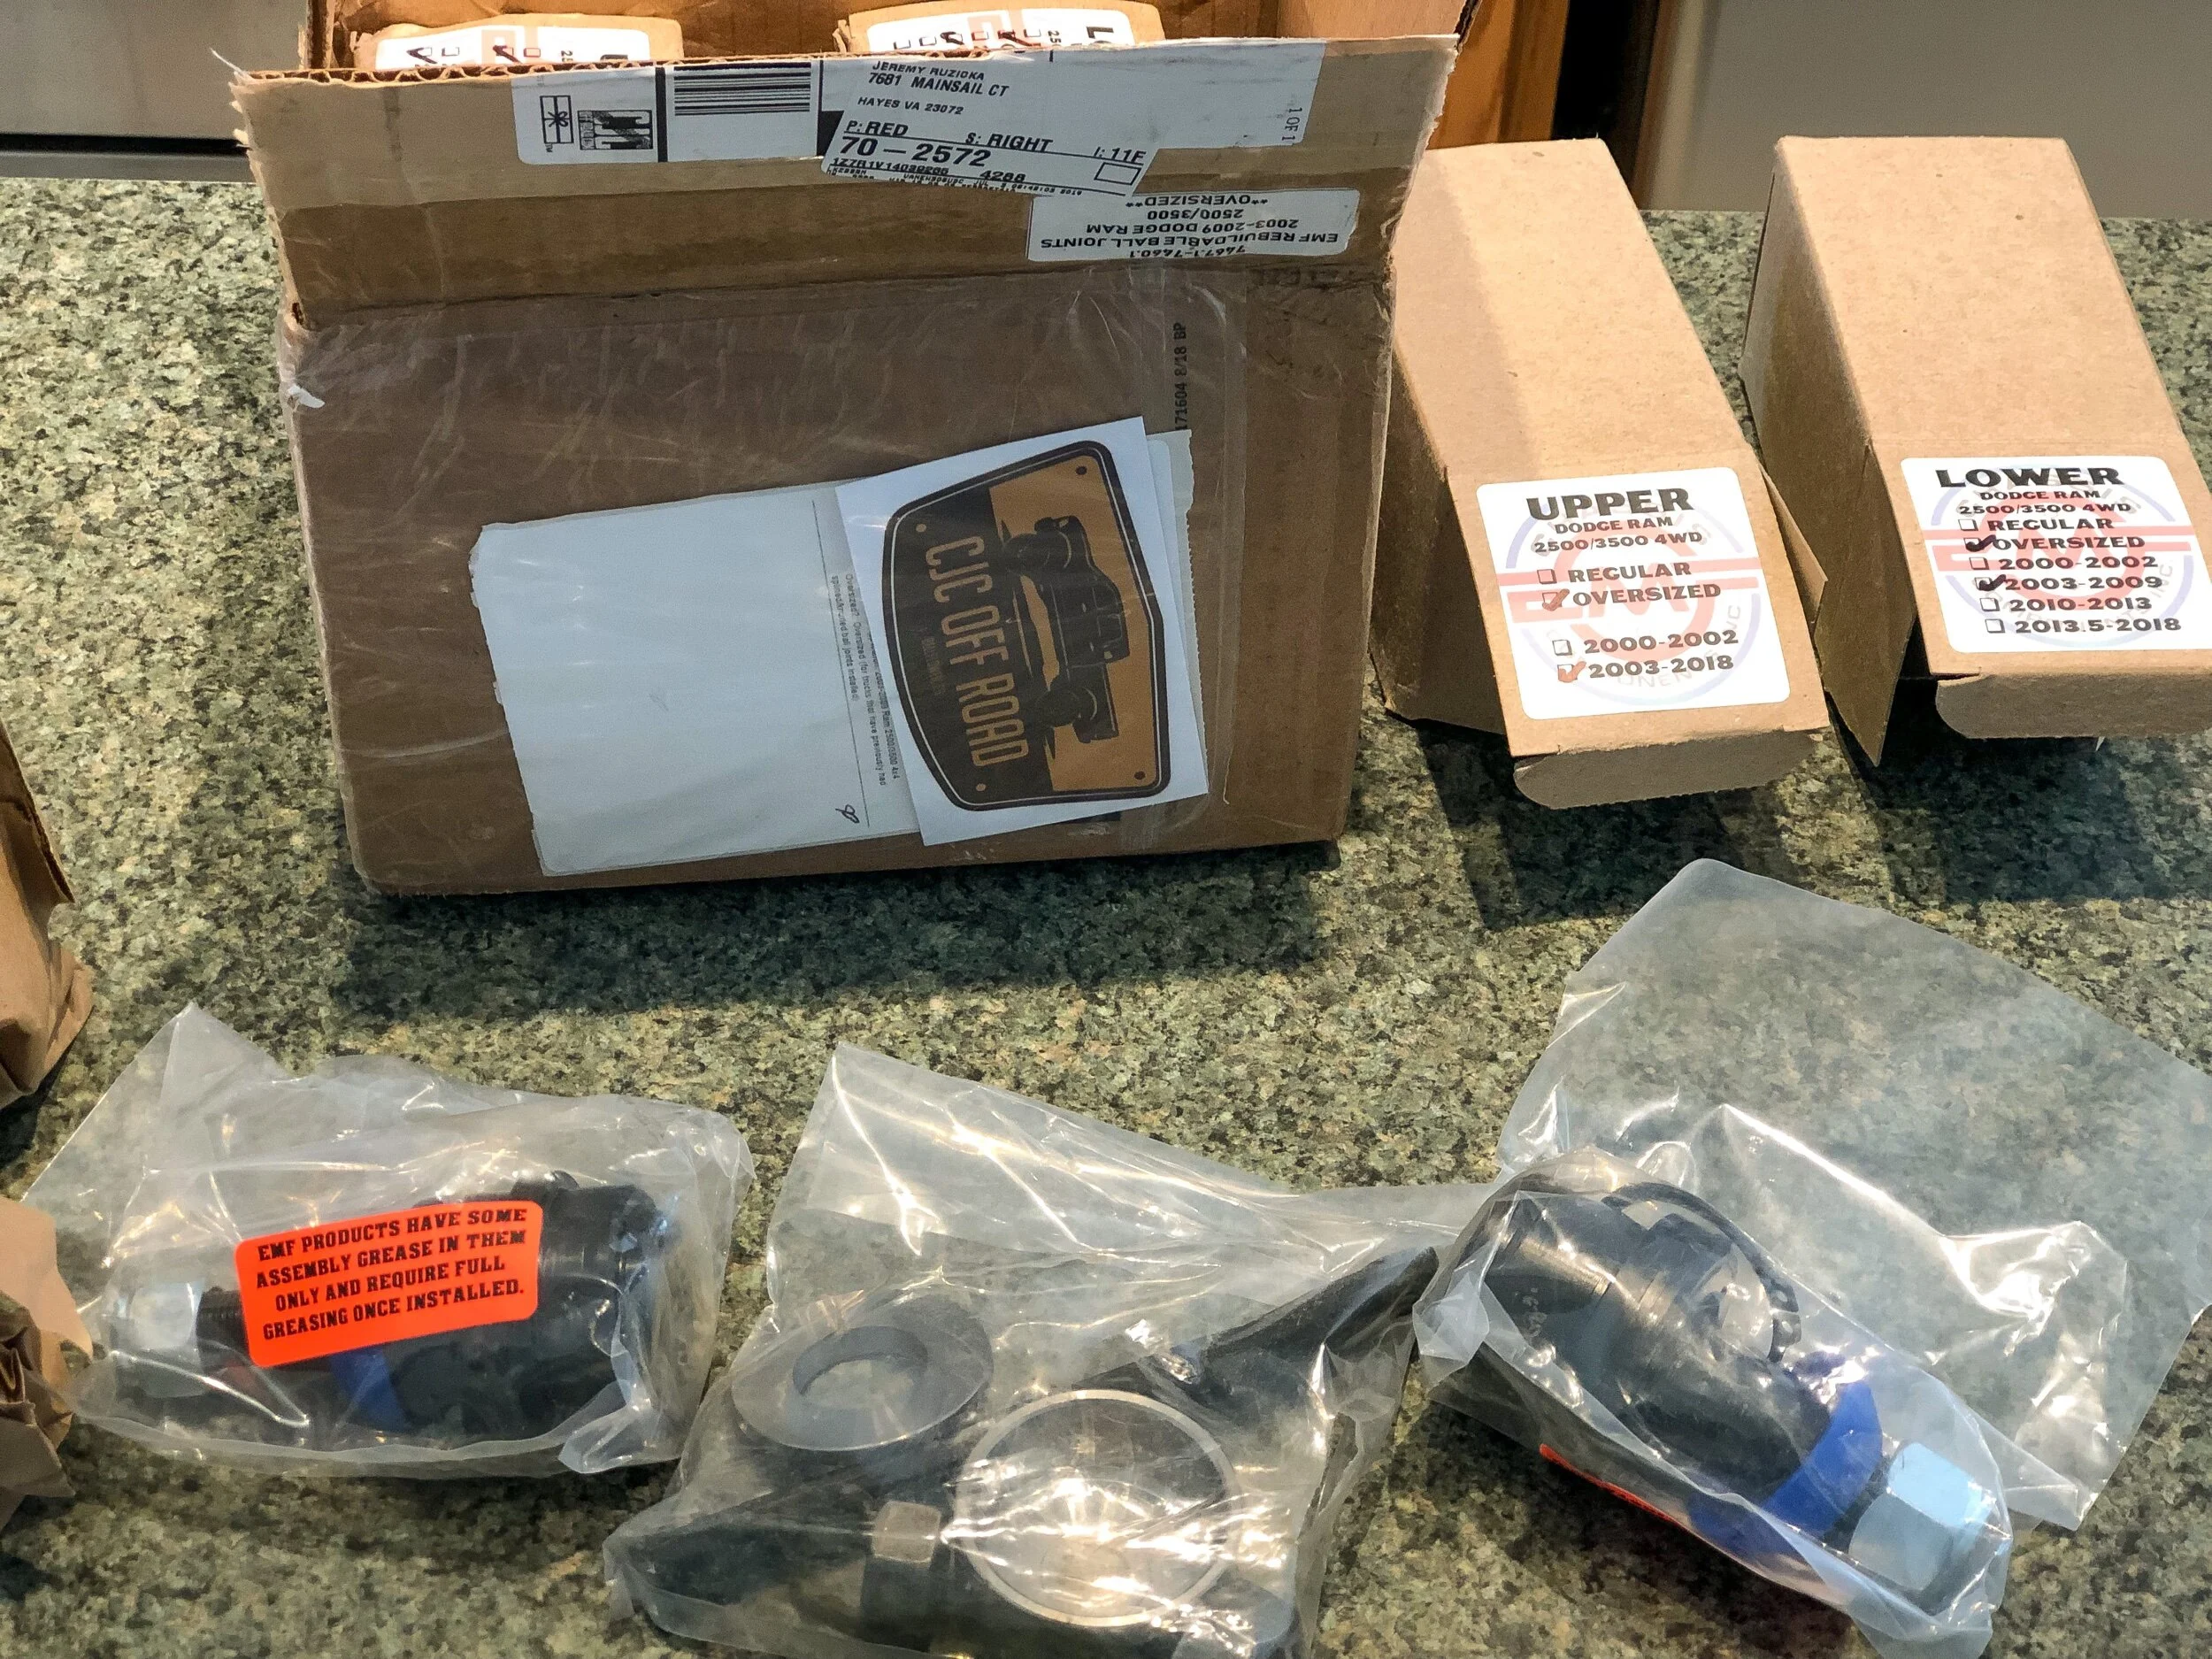
One of the great things about a Power Wagon is all of the off-road goodies that come as standard. Locking front and rear differentials, electronic sway bar disconnect, 4.56 gears, 2.5” OEM Mopar suspension lift with progressive springs and of course the 12k Warn winch tucked behind the front bumper. It’s a turn key adventure rig, but that doesn’t mean there isn’t any room for improvements. First and foremost we wanted to resolve one of the most plaguing issues of a 2500 Dodge pickup, the ball joints. We knew that we didn’t want to have to replace these over and over again and risk wearing out the flanges on the axle. So a call was made to CJC off-road to purchase a set of the serviceable and rebuildable EMF ball joints. Since the front knuckles had to be disassembled for the ball joint repair, it only made sense to replace the front hub bearings with OEM Timken hubs while we were in there. Their condition was unknown and it’s cheap insurance in the long scheme of things. For the steering we installed an updated OEM Mopar 4th Gen Heavy Duty steering linkage and pitman arm assembly, thus ridding us of the problematic Y-link 3rd Gen steering issues. Next we installed an adjustable track bar from Synergy Manufacturing to help further curb any steering shimmy or death wobble issues. Once the front end was dialed in we installed five 35x12.50R17 Load Range E BFGoodrich KM3 Mud-terrain tires to give us the ultimate traction off-road.


Our 12k Warn winch came from Dodge wrapped with steel cable. Knowing and having had experienced the hazards of working with steel winch line and the amount of kinetic energy they can store, we opted to switch our line over to synthetic. For this we went to Master Pull and ordered their Superline XD synthetic 7/16” winch line. This greatly increases safety around our rig during recoveries as it is also a closed loop system. There isn’t a thimble or a hook at the end of this line. Instead it’s looped at the end and threaded back into itself, eliminating any chance of metallic flying objects in the event of a line break, when being used with a soft shackle.


Electrical
Under the hood, we’ve added a BlueSea battery terminal fuse block to send power to a set of batteries in the bed of the truck. This fuse block also supplies power to the six fuse/relay box adjacent to the starter battery under the hood. Control of this fuse box is handled by an AEV 4th Gen switch pod that we have inverted and mounted on our dash above the transfer case shift lever. The switch pod housing has been modified to retain the OEM light that illuminates the cup holder area below. Above the switches to the right, we have installed a Ram Mount 1.5” ball for our 12.9” IPad Pro (for navigation) and power it using a 4.8amp BlueSea dual USB charging port just below the mount. A Redarc Tow Pro Elite is mounted within easy access of the driver, just in case we ever have the need to pull a trailer. To increase visibility on the trail, a 7” LCD monitor has been installed in place of our rear view mirror and is used in conjunction with a forward facing camera in the front bumper and a rear facing camera on the camper. Both cameras are full color and feature night vision in low light conditions. Additional exterior lighting is provided by four Baja Designs Squadron Pro’s. Two mounted in the front bumper fog lamp recesses and two mounted to a pair of SDHQ A-pillar brackets at the base of the windshield. Attached to the side of the camper is a WeBoost OTR 4G antenna, to help us connect to cell service when the need arises.


The habitat
We’ve been through many camping setups over the years and have learned a lot about what works for us as a family. This rig is another step forward in that progression and we went in knowing that we wanted something that could offer safety and comfort in just about any weather condition. Initially we had planned on purchasing a 4 Wheel Camper shell model as we really enjoy the build out process and making it our own. However, when we started looking into them, we really began to question the durability, size and weight of their campers. Where we live on the East Coast, trails are typically tight and winding. It is not uncommon to have to push through trails lined with thorn bushes or heavy brush/branches. The Power Wagon is already a massive vehicle and these trails have provided the pinstripes to prove it. Dragging tree branches against the thin aluminum/tin sides of a 4 Wheel Camper would ultimately result in damage to the exterior and costly repairs. Also, the starting weight of 1100lbs was a concern looking at some of the off camber situations we find on these trails, not to mention that it detracts greatly from our payload capacity. Considering all of the options, we ultimately made the decision to purchase an AT Habitat camper. With it’s robust aluminum exterior, cavernous interior and a weight of only 360lbs, it was the best option in our opinion and we are extremely happy with it.


Creating our natural habitat
For the interior build we had considered a full camper build out with cabinets, drawers, kitchenette and so on. Eventually we decided simple was better and the interior took on more of a light weight utilitarian build. We knew we wanted to continue to make use of our BedSlide 1000 CL in the bed of the truck, and this complicated the build slightly because it left open areas on the sides where gear could fall underneath the slide and prevent it from opening properly. To solve that issue we chose to install floating cabinets along the bedsides. Cardboard templates were made and a rough plan started coming together. Our camper would have cabinets that ran the length both sides of the bed, to hold extra gear, a water tank, diesel heater and a dual battery system. The cabinets are made out of Birch Plywood and have a natural look that is sealed in poly to protect them agains moisture. Battery holders were built into the back side of the cabinet walls to hold two 105aH batteries at the front corners of the bed. The main power supply runs from the starter battery, along the frame, through an access hole in the front of the bed where it connects to a RedArc BCDC1225 charger. A Noco shore power plug installed into the front corner of the habitat runs to a Noco Gen 2 smart battery charger and allows us to charge the batteries on 120v AC. A second plug off of the Noco shore power plug runs around the perimeter of the bed to the right rear corner where it connects to our SnoMaster 87D Expedition series fridge/freezer, allowing the fridge to run off of 120v AC as well. BlueSea fuse boxes installed in the front and rear of the camper supply power to the electrical circuits installed in the camper. HardKorr LED lights covered in Lamin-X red film, converting the white LED’s to red light, were placed under the sleeping platforms on both sides. This helps to keep the bugs away when using the lights in camp. Further aid in preventing bugs in the camper comes from a custom screen curtain that was made for the back. It attaches with Velcro around the perimeter and opens via magnets in the center. Water is provided by a Front Runner 10gal water tank mounted at the front of the bed which feeds through a flow jet diaphragm pump and RV water filter to a water quick disconnect near the back of the bed. Warming the camper in the winter is an Espar D4L diesel heater that is mounted to the floor inside the cabinet on the passenger side of the bed. Fuel for the heater comes from a 2.5gal fuel tank on the exterior of the driver side cabinet. This allows us to keep tabs on the fuel level at all times and makes for easy fill ups by opening the top hatch on the Habitat. L-track is installed on the interior and exterior sides of the Habitat and allows us to secure a multitude of gear to the camper sides. This keeps it organized as well as up and out of the ways all times. L-track installed on the tailgate allows for the utilization of two Blue Ridge Overland Gear tire storage bags. One used for extra shoes and dirty clothes storage and the other for trash.


exterior modification
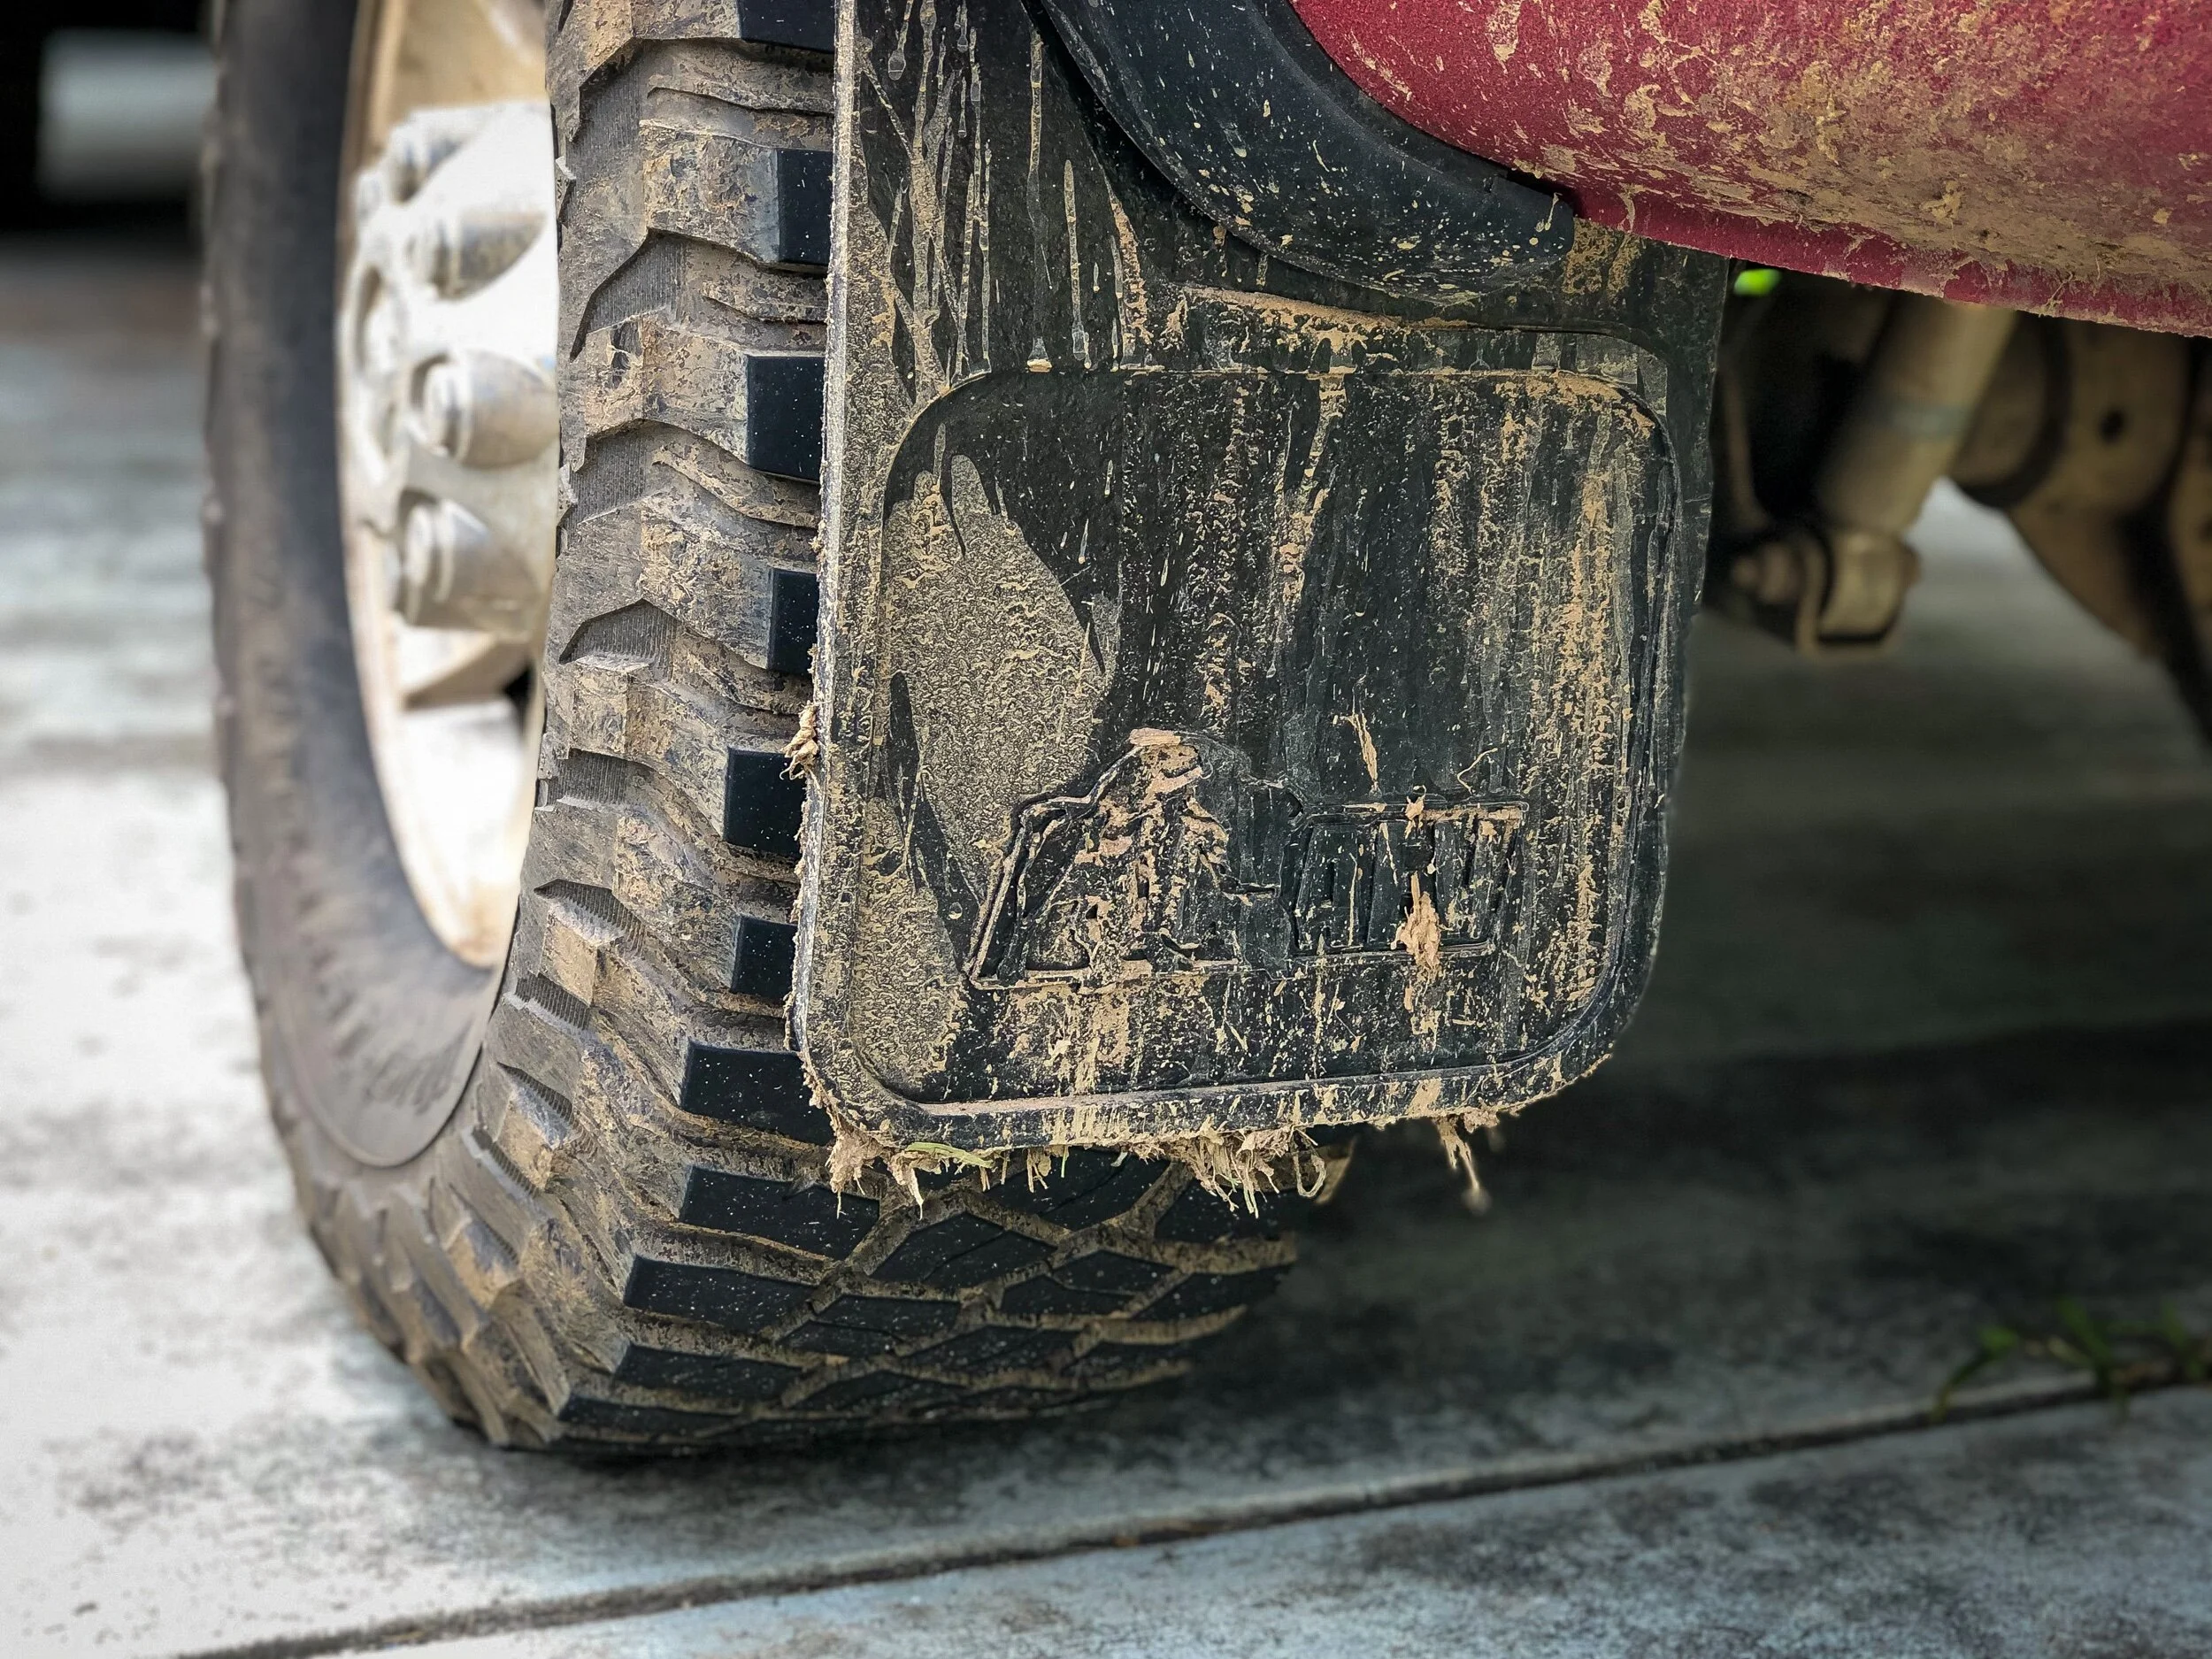
Mechanical modifications to the Power Wagon have been kept as minimal as possible. This allows us to pull into any dealership or repair shop to have the vehicle serviced. It also allows the use of off the shelf parts from almost any automotive retail parts store along our travels. We did make some exterior improvements though. On top of the cab we have installed a Rhino-Rack platform roof rack that holds a weather proof rifle case. The case is lockable and houses our awning, poles, an annex room, a hose and an extension cord. The front of the rack has intentionally been left open to save weight and to carry our chain saw and firewood when needed. The lower portions of the body, have been coated with Raptor liner to prevent corrosion and damage by rocks and other trail debris. Taking the protection one step further, a set of modified AEV 4th Gen mud flaps have been installed on all four wheel wells. They do an amazing job of keeping the rocks, branches and mud from flying up off the tires and onto the side of the truck.


We could go on forever about the little details and modifications that have been done to this rig, but we won’t bore you with all of that. It’s a work in progress and it’s not finished yet. We’ll try to update things as they progress. In the mean time we’re going to get outside and use this rig for it’s intended purpose, to track down adventure. Hopefully this write up provided some insight into the work that went into getting the Power Wagon where it is today.


Update:
Camper Build version 2
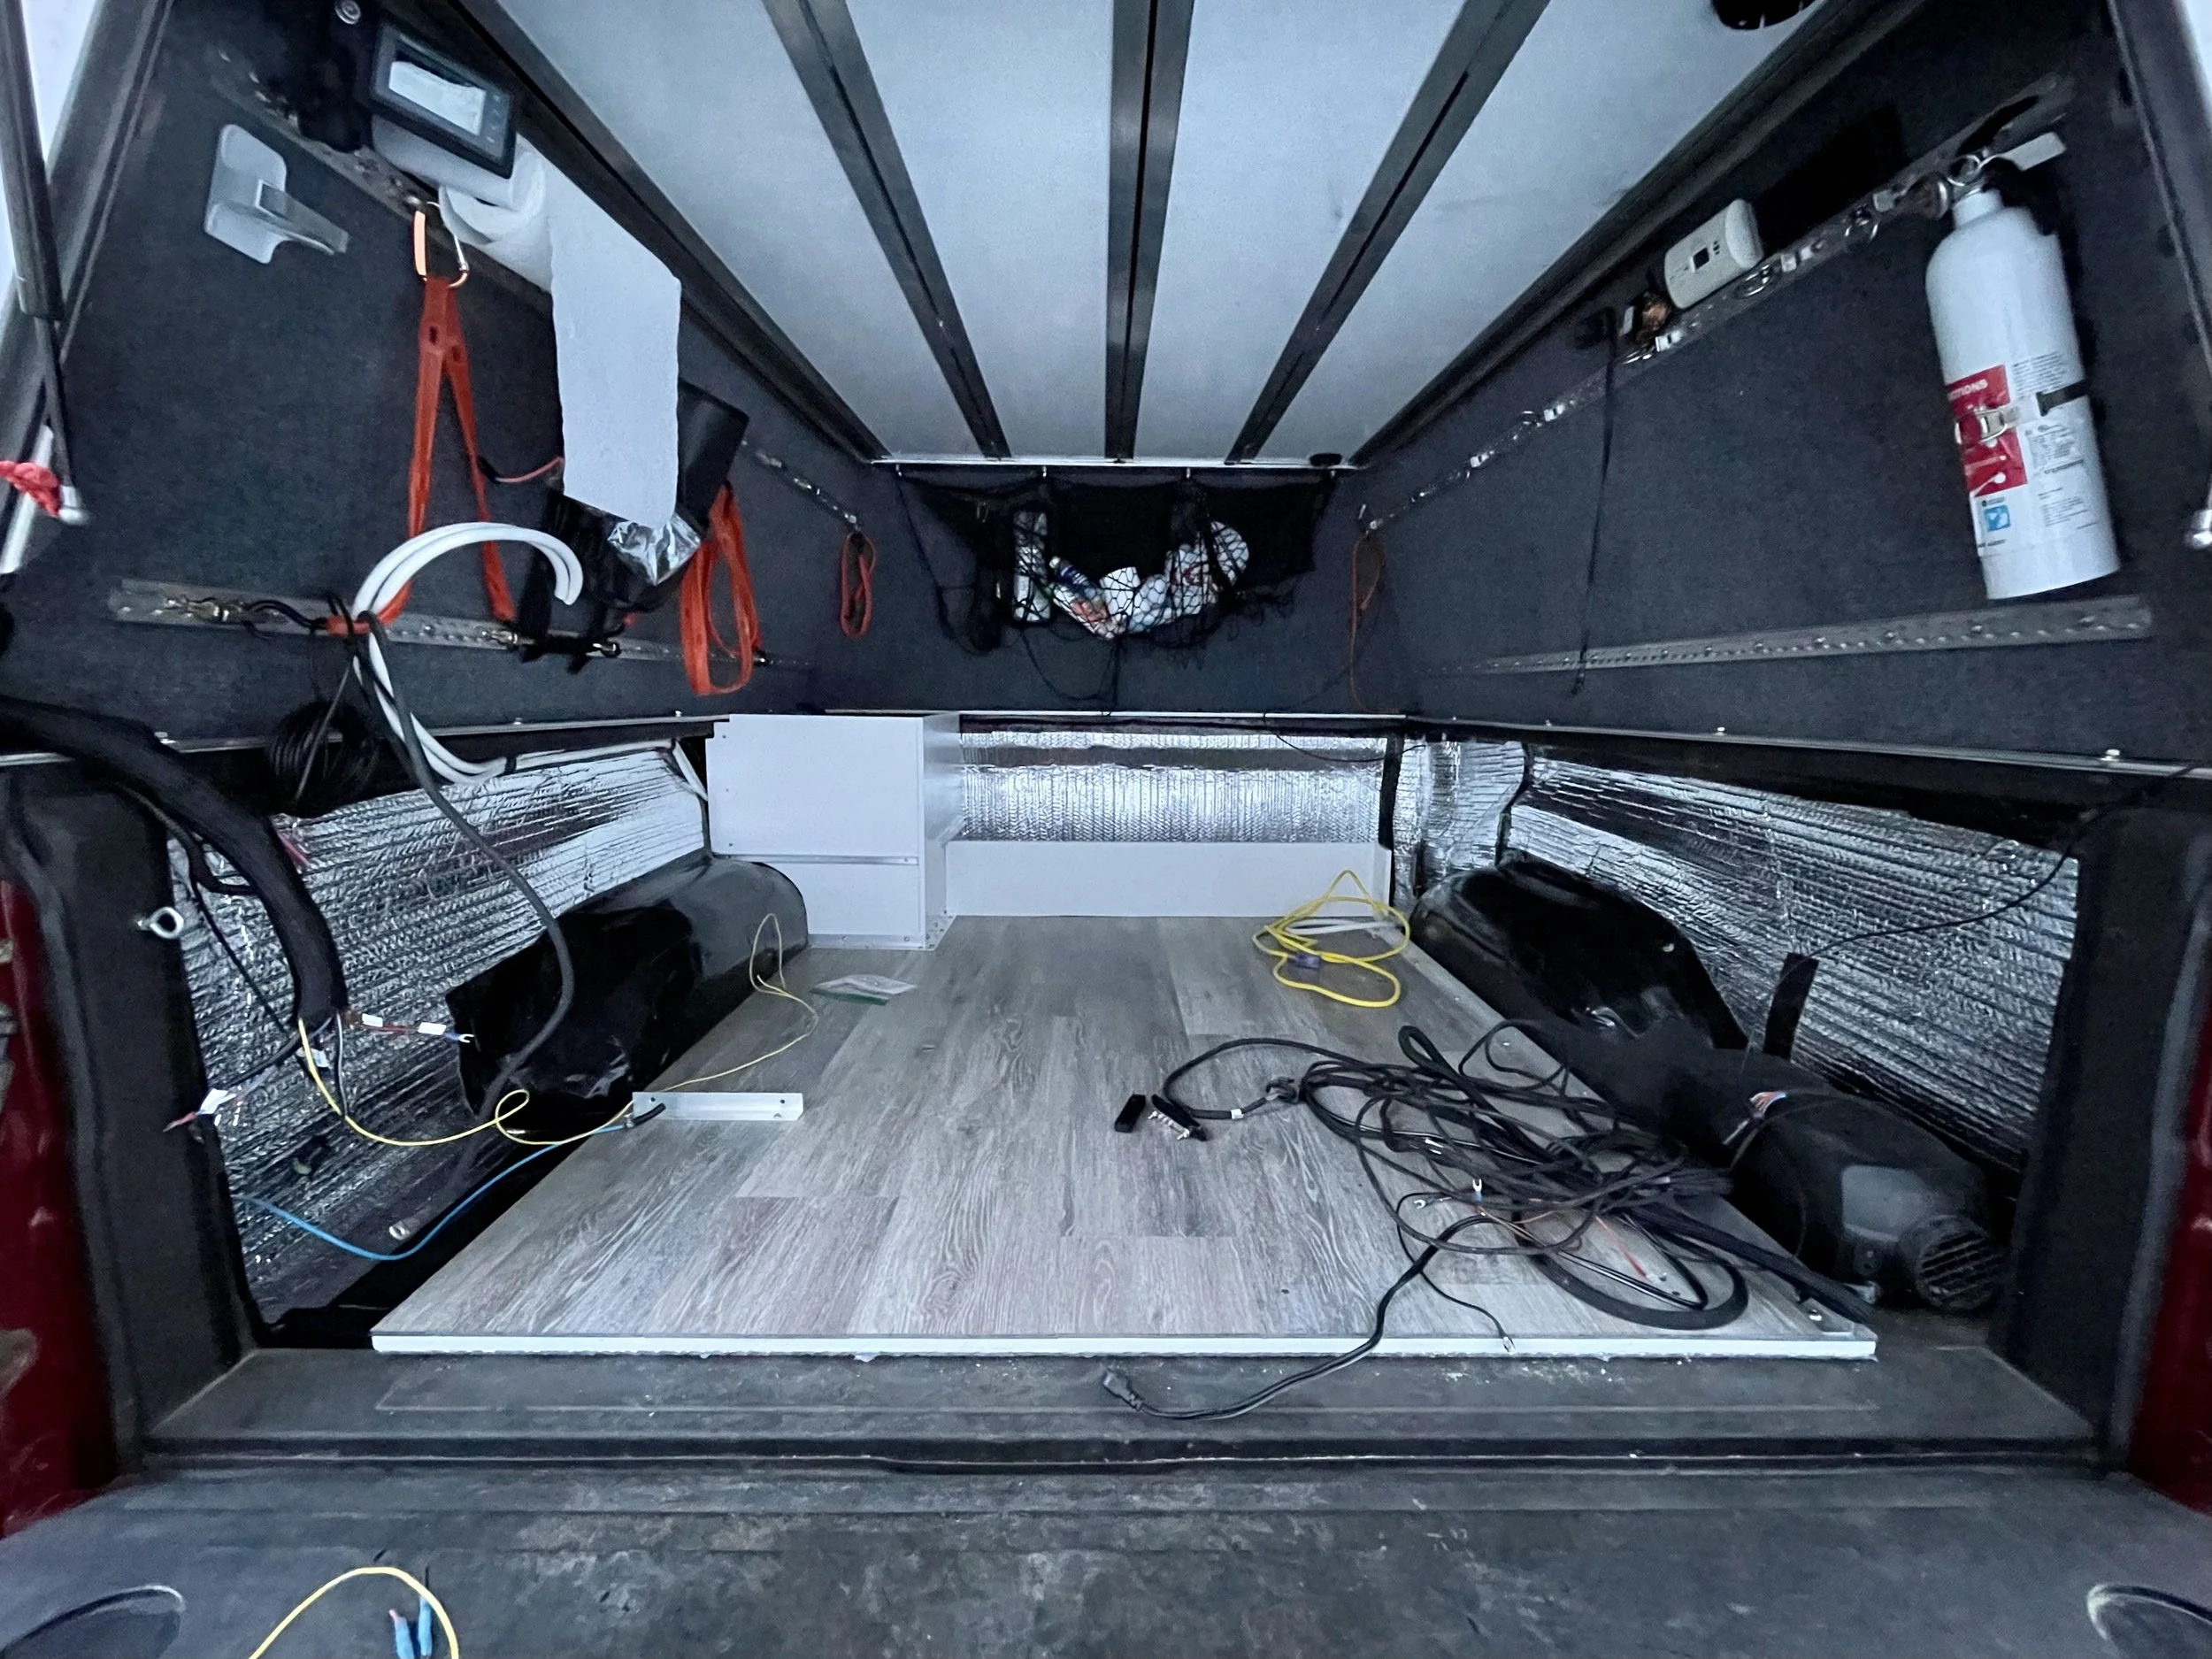
After spending a lot of time traveling in a vehicle, you start to pick up on things that you’d like to change about it. Things that would ultimately make the livability more comfortable. Our current setup in the AT Habitat was all about versatility. Being a multitool of sorts. This was great and served its purpose, but the more time we spent in inclement and colder weather, we discovered that it would be nicer to have a more comfortable space to hang out in. Something that was able to fit all of us with ease and yet keep our gear organized and easily accessible.

We ripped everything out of the bed and started from square one. Jennifer and I, with masking tape in hand, laid down a rough idea of how we thought the layout would be. This gave us the ability to physically see if the dimensions would be to narrow or too wide. With a rough idea in mind, we fabricated a base plate and mounted everything using regular old aluminum L channel, stainless steel button head screws and stainless steel wood anchors in the panels. This allowed for any panel in the build to be removed, for systems modifications or replacements at anytime in the future. This is something our previous build lacked and had come back to bite us multiple times in the past.

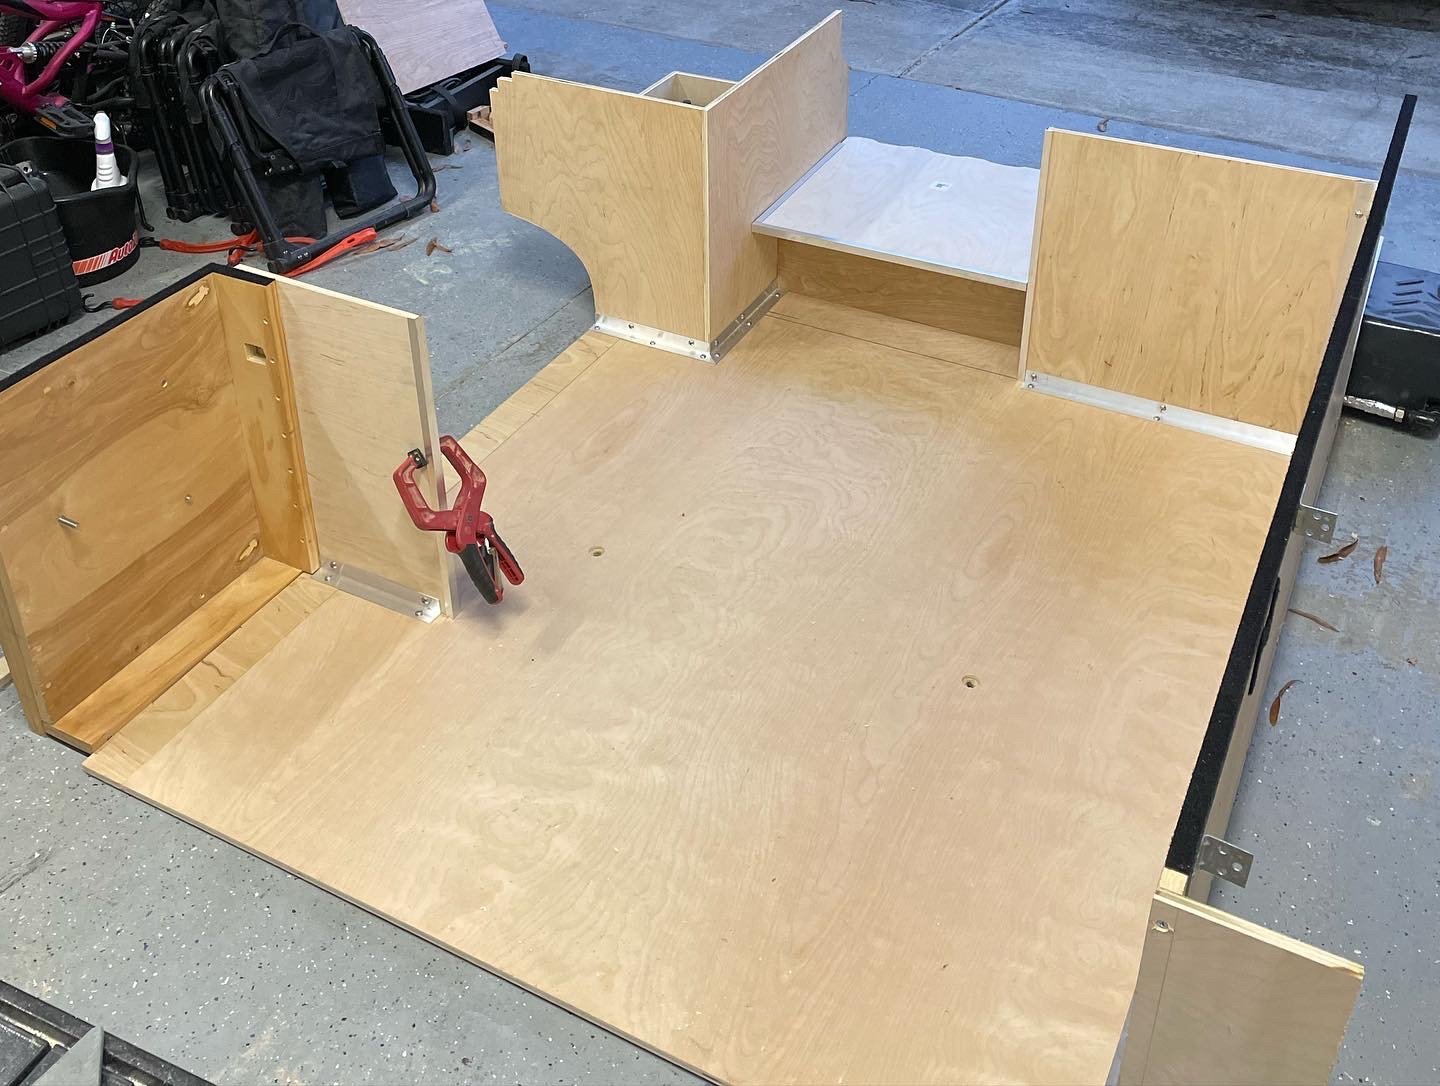
With the layout of the base plate and cabinetry figured out, we stripped it all back down. After sanding, we sealed everything with two coats of Killz paint as a base, 3 coats of white exterior paint and two coats of Poly to lock it all in and make cleaning a breeze.

Marine grade carpet was attached to all of the cabinet tops and a waterproof floor was placed onto of the base plate. A layer of insulation was placed under the base plate and up the bedsides to help regulate the temps inside the camper.


Next we began to lay the wiring and install the systems.


With the systems mounted in their homes, final assembly was done and the rest of the cabinetry was installed. The base plate edge and all vertical corners were capped off aluminum L channel, while the front faces of the shelves received aluminum C channel to protect the edge and finish the look. Our SnoMaster Fridge was bolted to the floor utilizing aluminum T channel brackets that bolted into the feet on the fridge. L track was mounted to the upper front edge of the camper so each persons individual packing cube from Blue Ridge Overland Gear could be hung up and out of the way. Three Front Runner high top cases containing our kitchen, food and general supplies fit under the benches. Two at the front and one across from the fridge. Our Front Runner chairs secured next to the kerosene tank for our heater, we designated this space just for them to prevent mud and dirt from going too far into the camper. Our Kitchen bag and hose clipped onto the side of the fridge and just cleared the tailgate when closed. The water hose and water fill ports were located in the cabinet top adjacent to the fridge. Our marine style cassette toilet is located between the fridge and the front bench. Speaking of the benches, three outdoor cushions were attached to the front and side cabinet tops via velcro. This allowed the cushions to be removed and reconfigured as needed.


As you can see from the changes we made, this configuration was a lot more comfortable when spending time inside the camper. Believe it or not, it was also a lot more usable as well. The storage was way more than we had before and everything just felt more dialed in.